

I learned about CyberBrokers Genesis Mechs from the media coming out of NFT.NYC and was awestruck by the magnitude of the project, the incredible artwork, the detail of their assets, and the powerhouse of talent and creativity behind it. Once I saw the configurator, and then the video showing models being 3D printed, I was determined to not only build one, but to print one as well.
Having printed for years on FDM printers and recently switching to resin, I couldn’t think of a better use of my new Elegoo Saturn 2, a printer with the ability to 3D print in stunning 8k resolution with a variety of material. I chose a translucent, water washable resin in blue, the color closest to the mech I configured in the CyberBrokers Snap Shack.
Finding My Mech
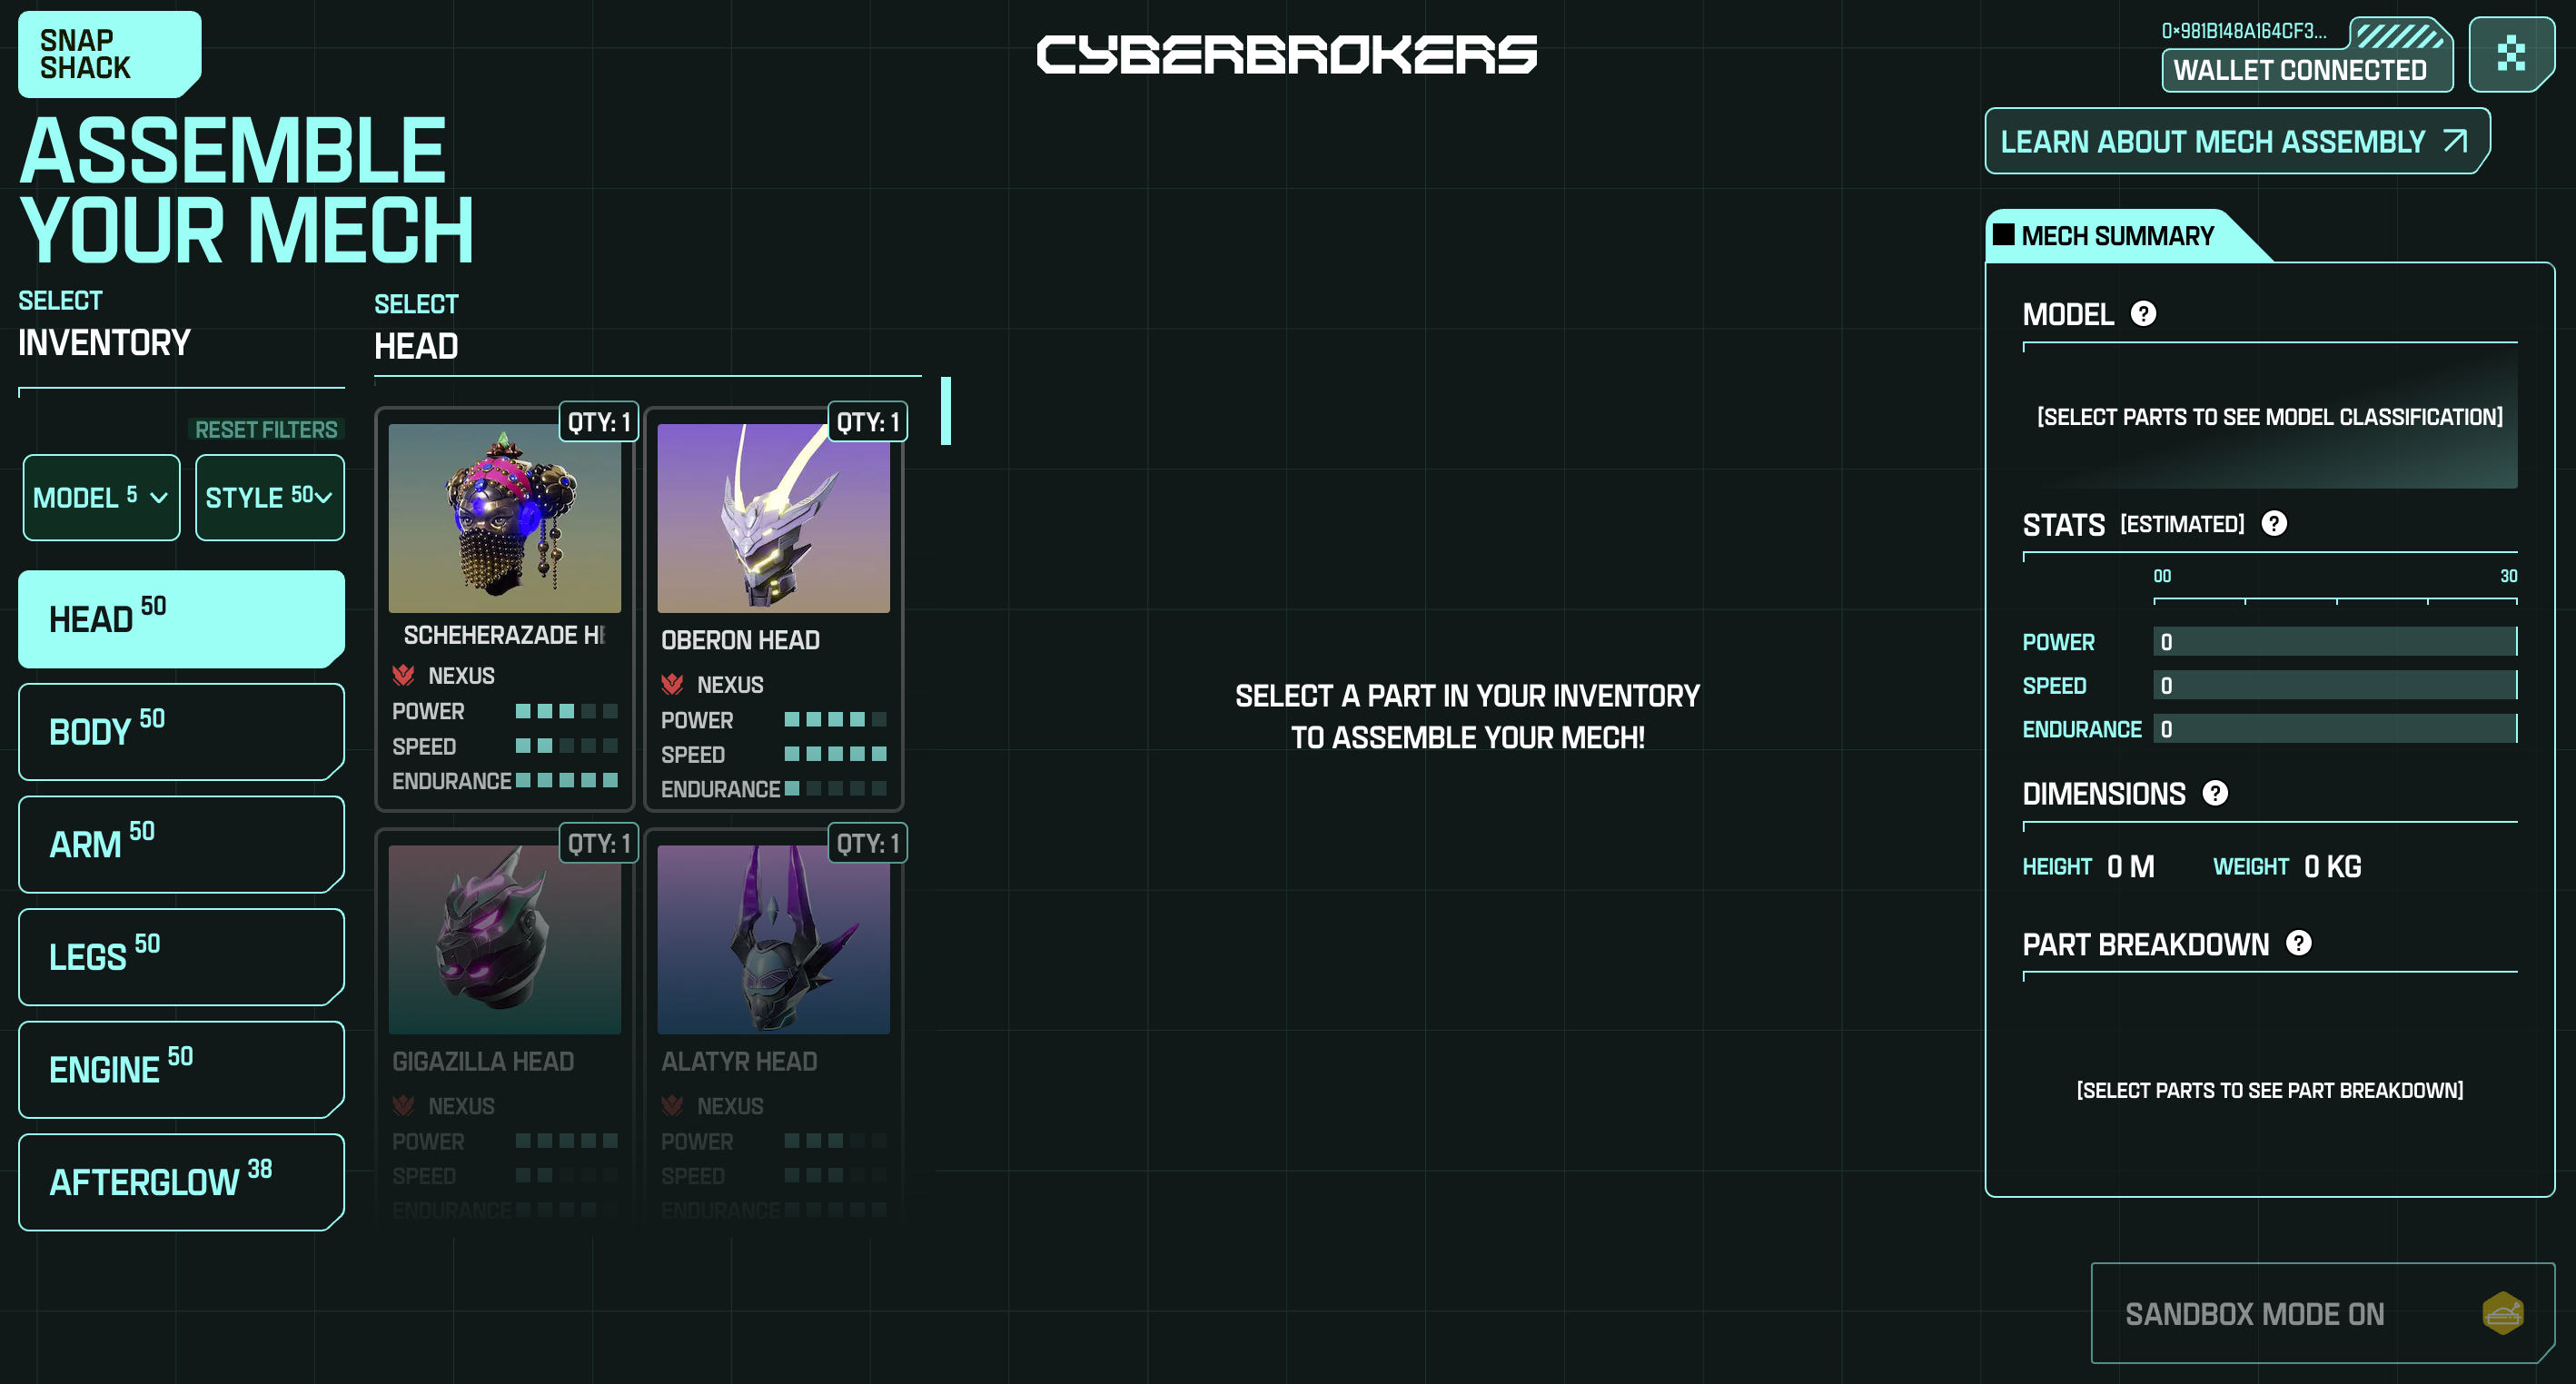
Figuring out how to create a mech with the look and personality I wanted was a daunting task. First, I had no idea where to start. Do I start with a head, a body, an engine? Do I think about the power, strength and endurance traits first or last? Do I choose a model or a style and go from there? Many of the various parts in the configurator don’t even seem to match from a size perspective. I spent a couple hours creating variations in their Sandbox and couldn’t really figure it out. I went back and read what parts you needed with other parts, which in hindsight is actually pretty easy (two of any parts that match the engine). I looked at many other completed mechs that others had built, but nothing really hit home for me.
Nexus? Lupus? Not for Me
At first I was drawn to the model types that have the most power, speed and endurance. Thinking about the future utility of these in Metaverse environments, it makes sense that having a strong showing in these traits would be what one would want, so like any other gaming aficionado, that’s where I began. I started with the power players, Nexus and Lupus, but I quickly learned after perusing OpenSea, that these parts are not only rare, but expensive.
Sticker Shock
Once I started pricing these parts, I quickly came to realize that I could deplete my bags pretty quickly with one of these rare species. But, what I realized was that the process of pricing actually made it a lot easier for me to make decisions on what Mech Models actually fit my mental model of what one of these beauties should cost. So, I set a budget of .5 ETH or less, and headed to market.
When I got there with my mind set on something strong, fast and endurant, it quickly became clear that I was way out of my league. All I had to do was sort by model style to see that parts weren’t only not available, but the ones that were, were mindblowingly expensive. Since the one thing you have to do is match two parts to an engine, I started there.
As you can see here, my budget’s already toast. There’s one Nexus engine available and it’s 1.25 ETH, and it’s not even the best one. Don’t even get me started on the price of a Nexus head.
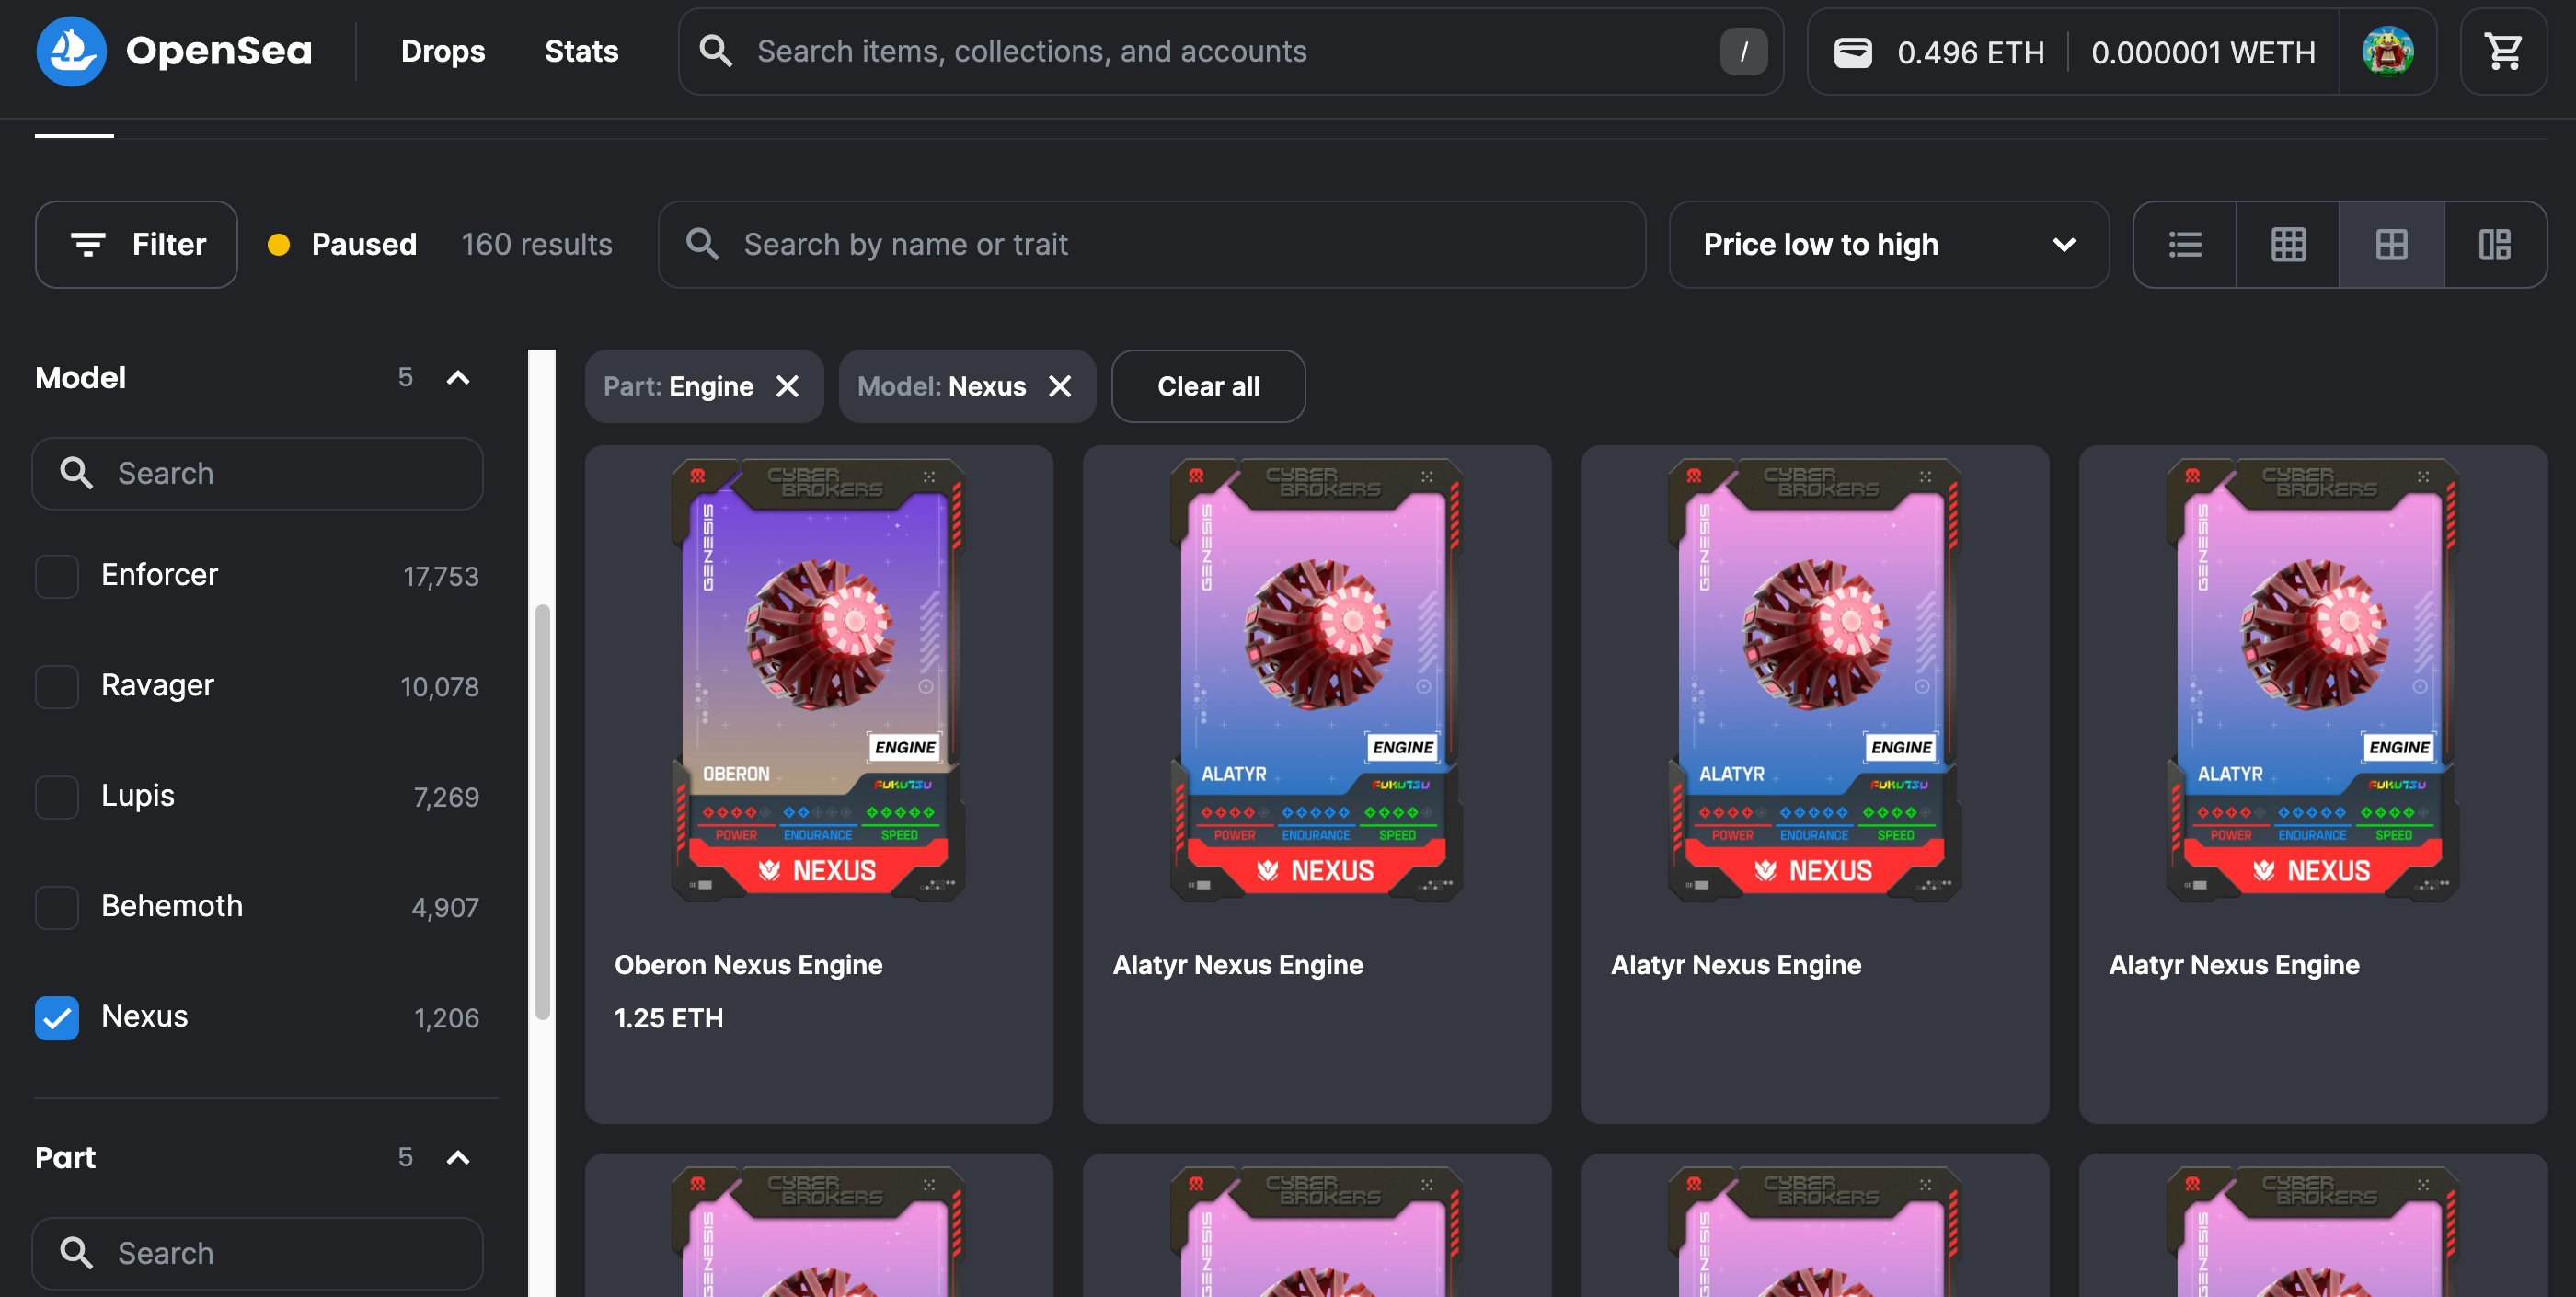
One look at the left side of the screen above, and it’s clear that rarity precedes price. So, I quickly split the Bergdorf Goodman scene and headed to the Bargain Basement, where my journey toward owning an NFT I could print and put on my desk started to look like a reality.
Piecing it all Together
Seeing that Enforcer and Ravager parts were a lot cheaper than the rarer parts, I started my search. Knowing the engine would dictate the two other parts I selected, I looked first for those. Unfortunately the assets I found that were affordable also had pretty spotty stats, like being high in Endurance, but low in Speed and Strength –not really my speed (hehe). So, I kept looking and was happy to find that, although low in Speed, some of the Behemoth engines actually look pretty powerful and fast. Now the Behemoth’s are the biggest of the mechs, so in my mind, speed didn't seem so important after all. A quick trip over to the other body parts confirmed that I might actually be able to make something work with my budget.
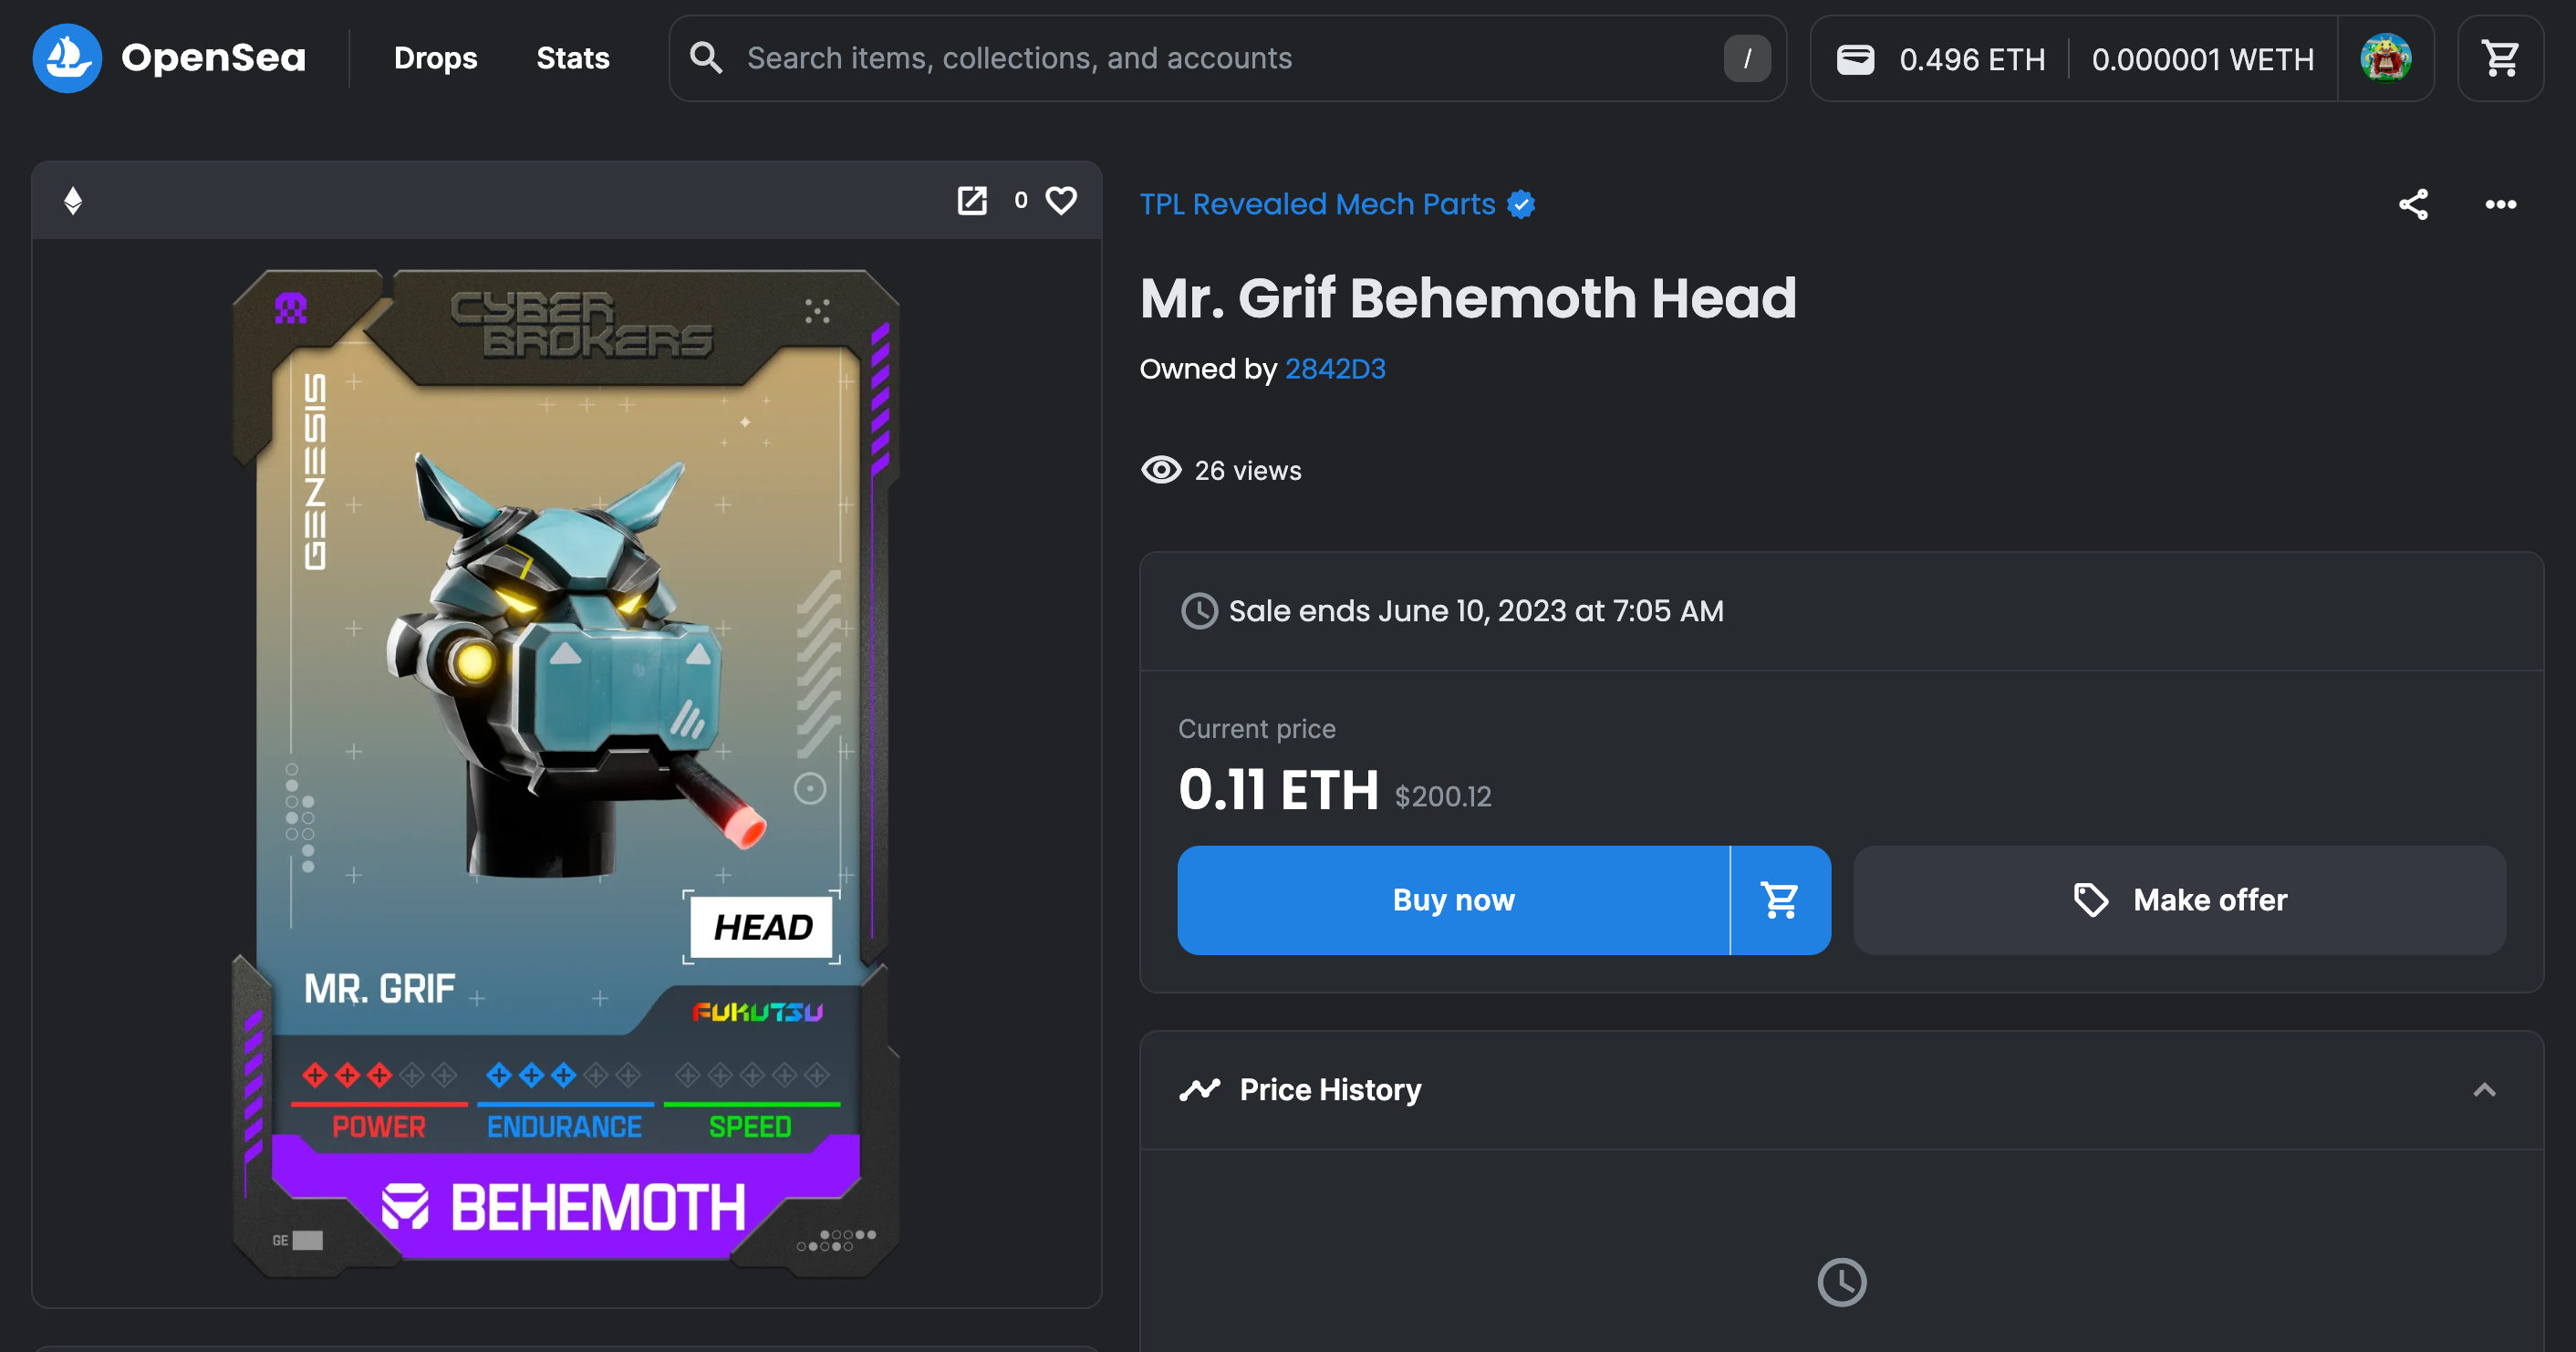
In Walked Mr. Grif
There he was, half a scroll down the page with the head filter selected and I found the big, ugly mug of my mech. Once I saw his big blue hippo-hog head, radiant eyes and ears that resemble my own rescue mutt, I knew he was the one. And to top it off, he’s smoking something --puff puff, give. The price… maybe a little high, but maybe I could make it work.
Here he is, in all his For Sale glory:
Back to the Sandbox
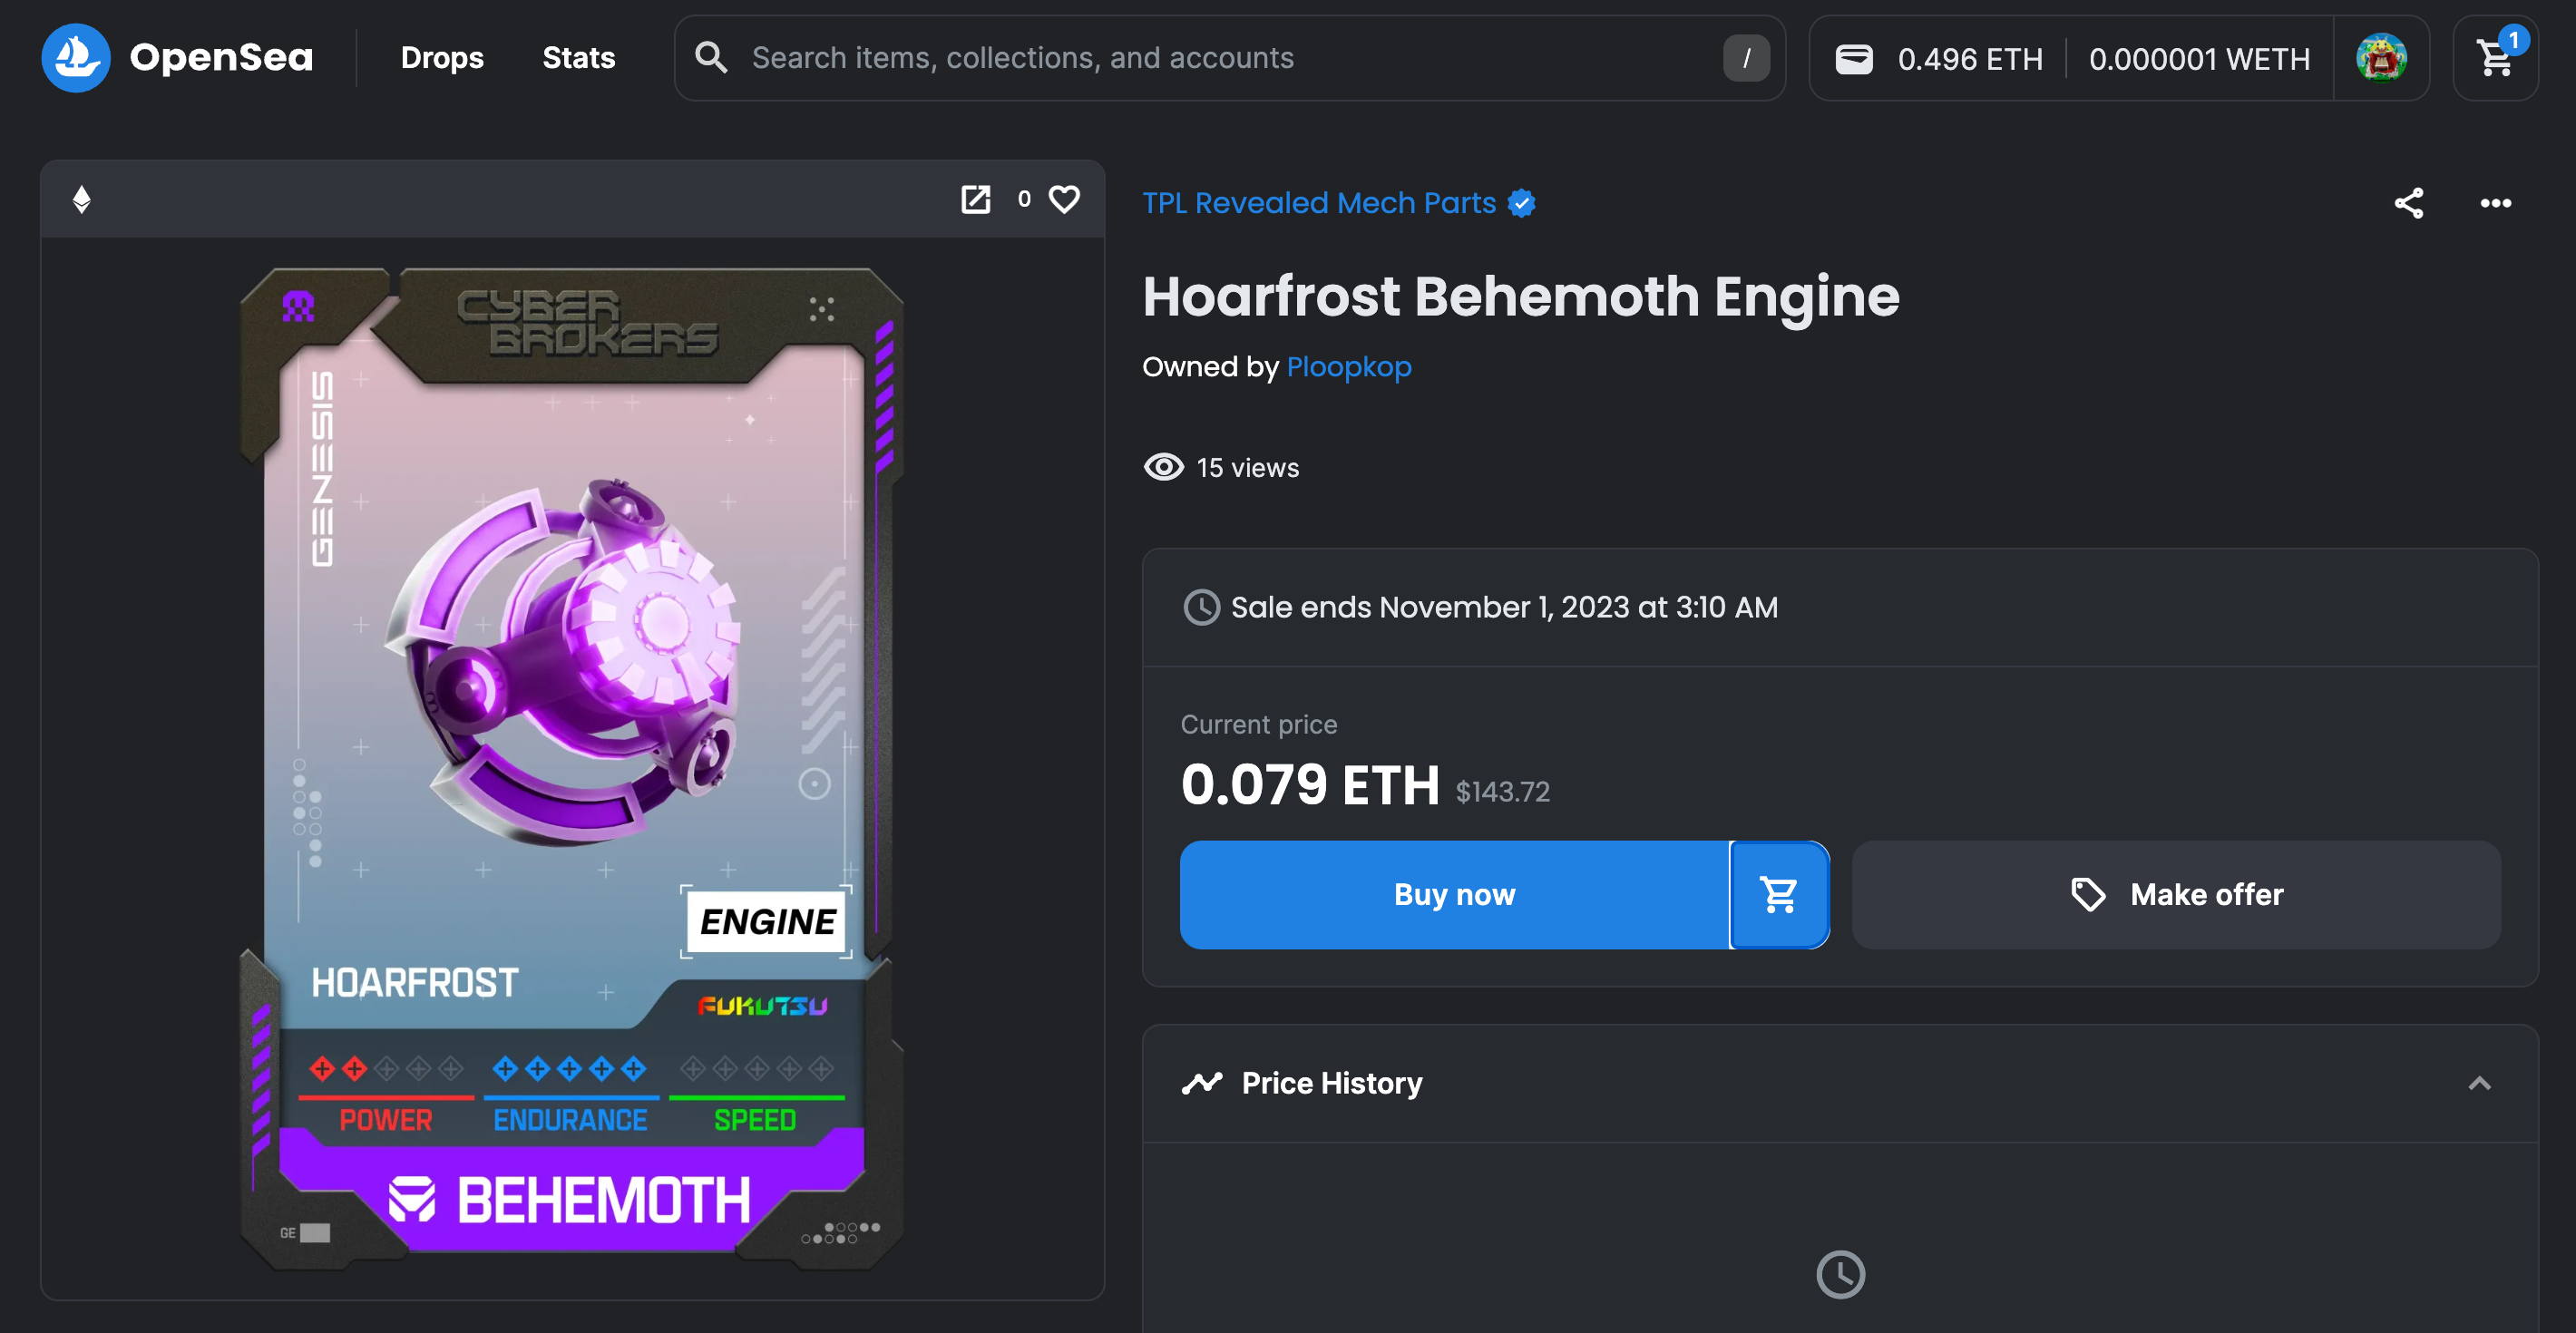
Once I had the head, I looked for an engine. Turns out, even though the Behemoth is the second rarest model, the parts are somewhat reasonable. I found a Hoarfrost model with maxed out endurance for 0.079 and moved on.
From there, it was back to the CyberBrokers site where I spent some time toggling back and forth between the Sandbox and OpenSea and after some trial and error, landed on my final design.
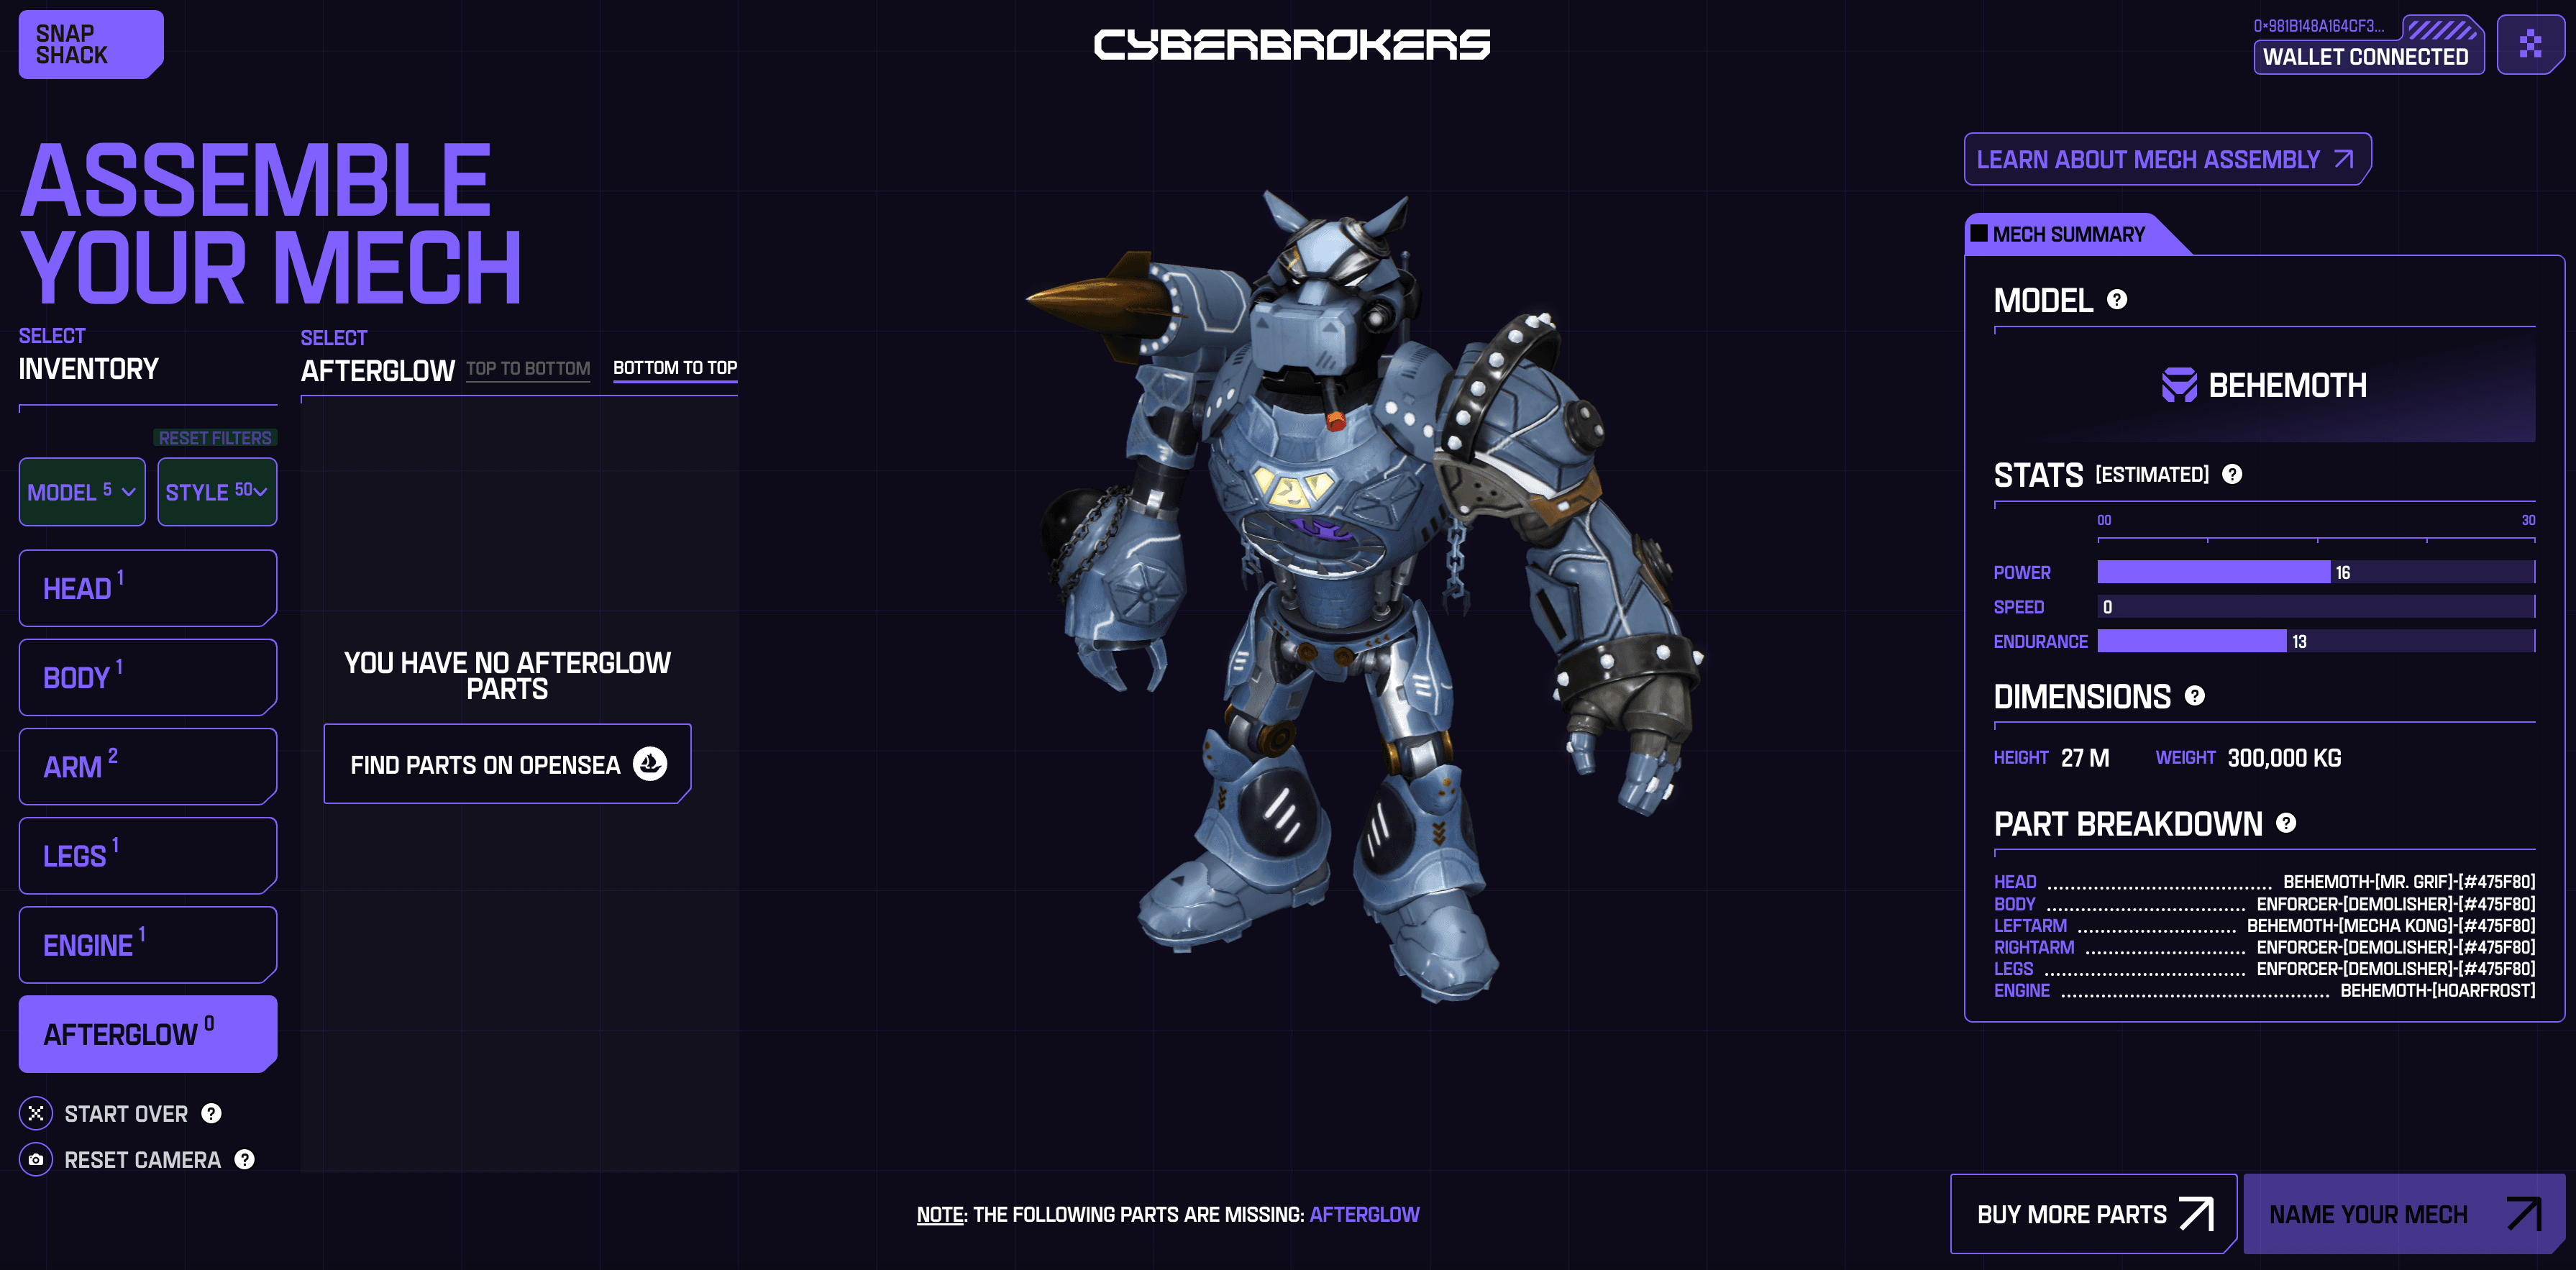
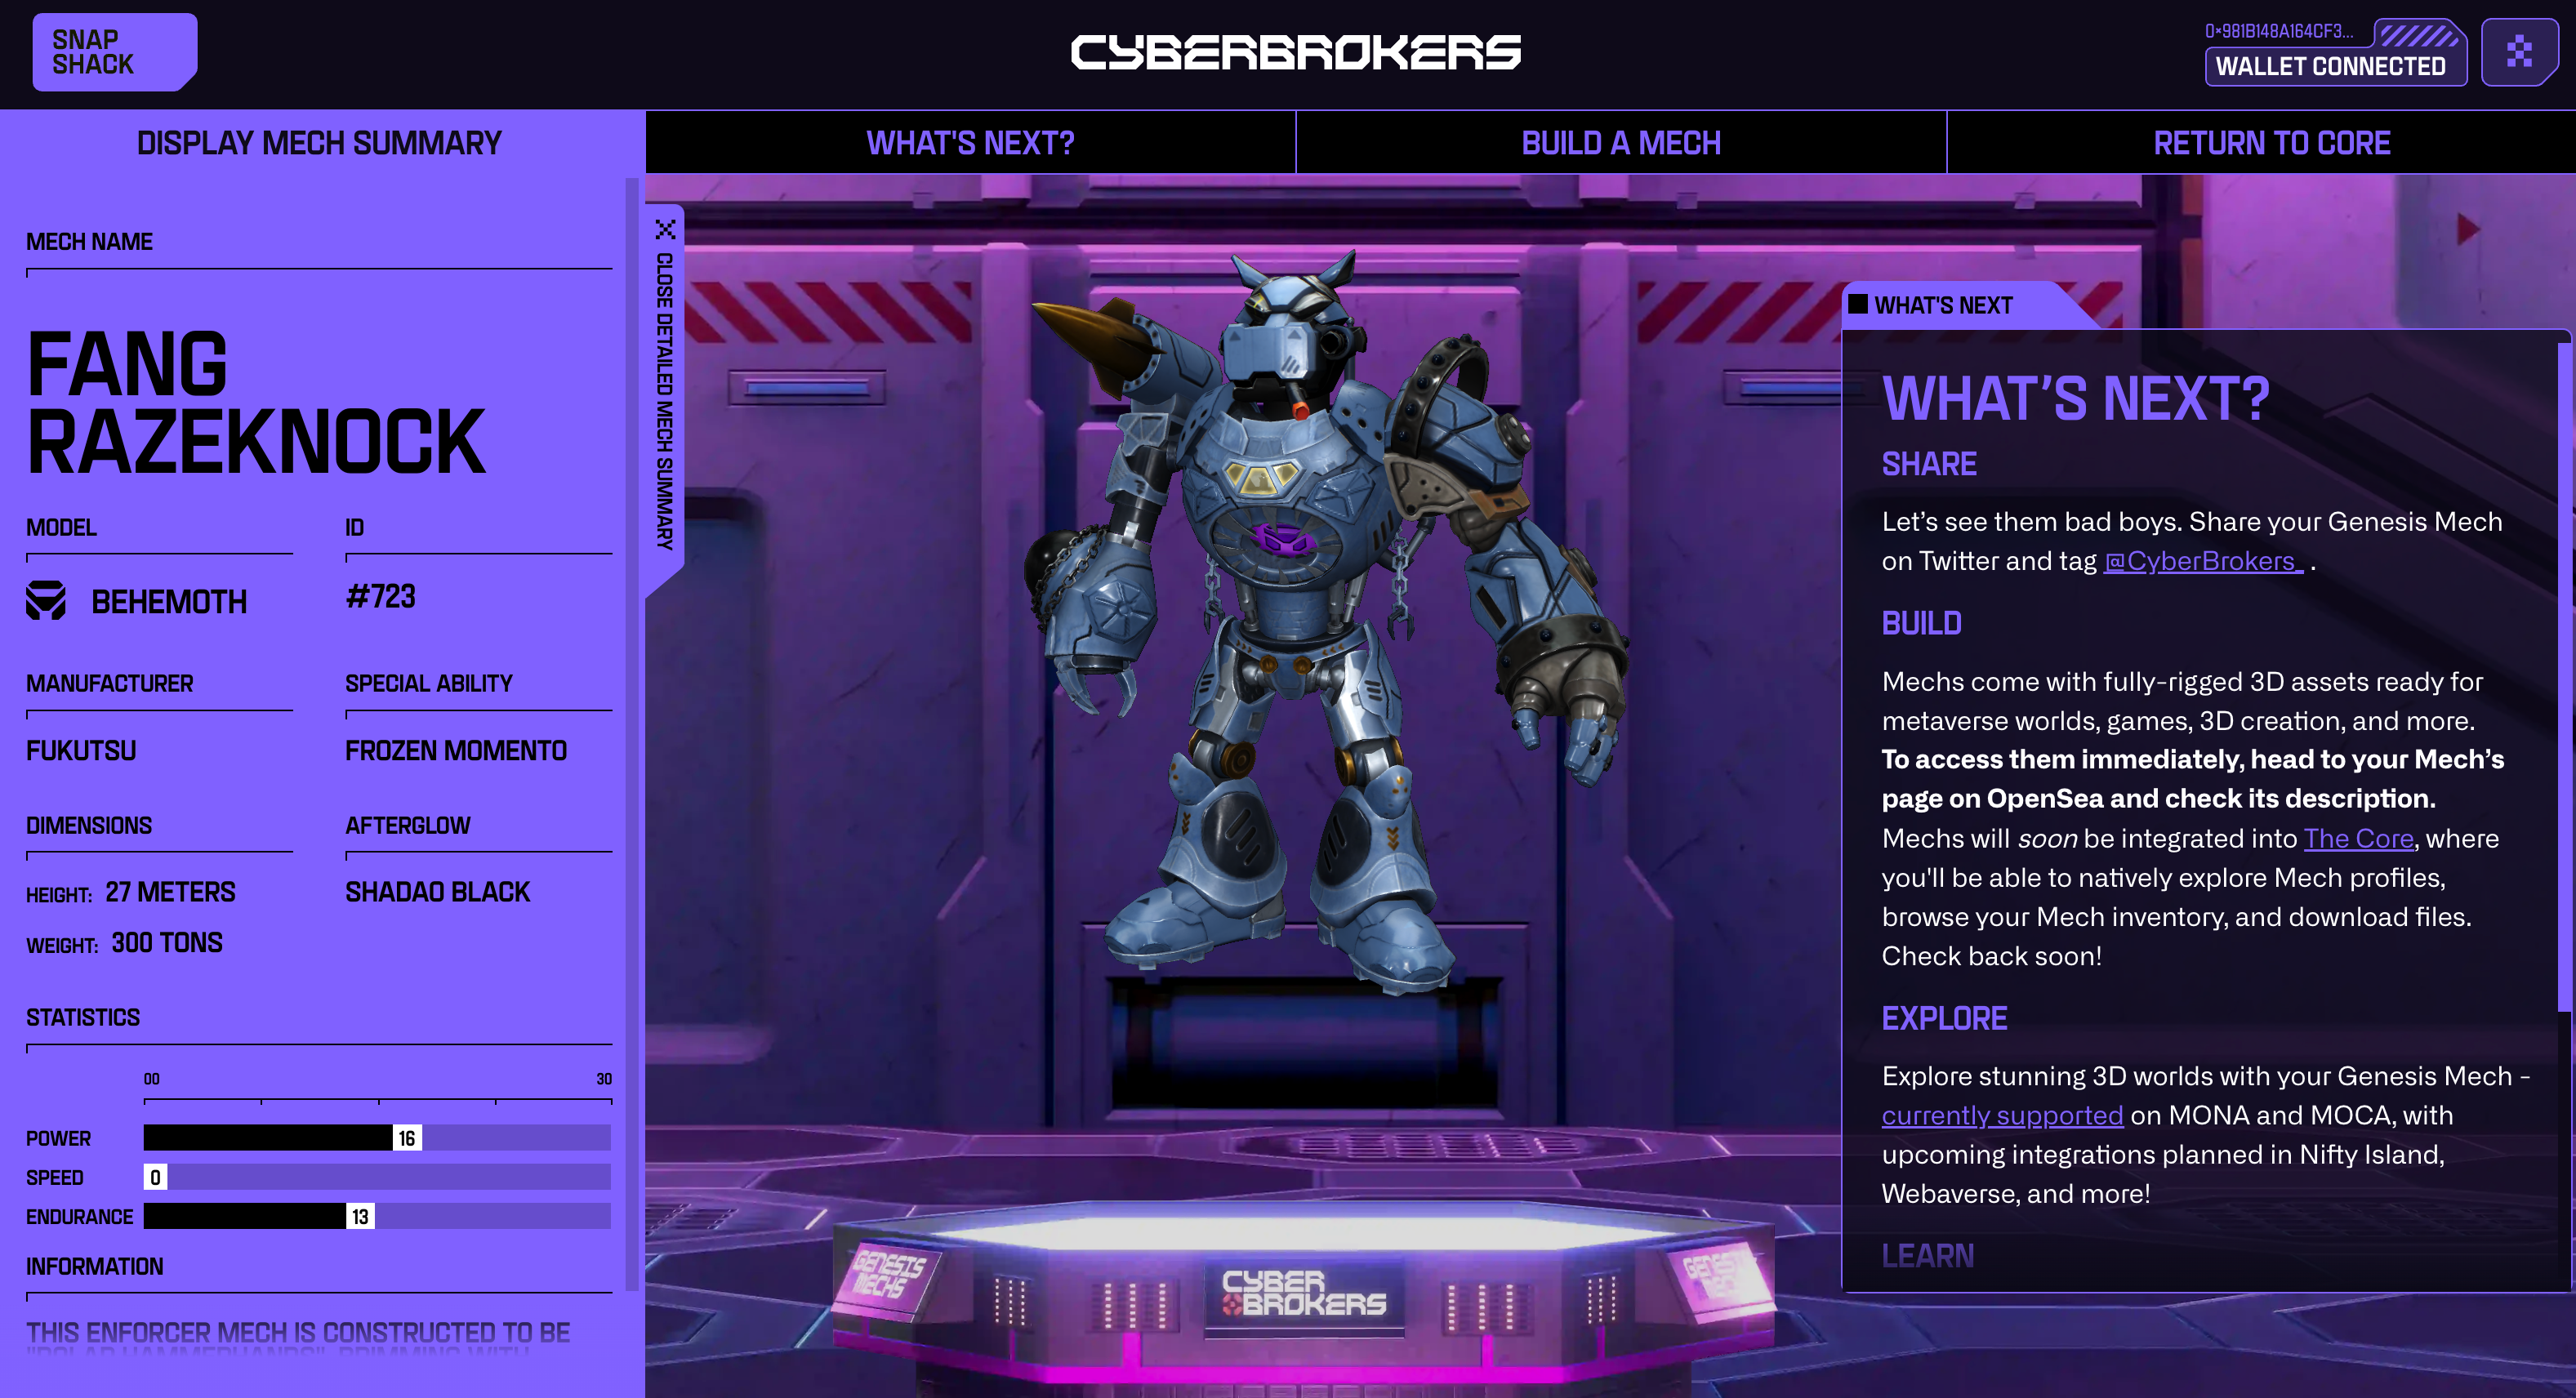
Here’s what I came up with. He’s a Behemoth/Enforcer Hybrid. I’ve seen a lot of other mechs in the last few days, and honestly, I think my creation turned out to be pretty sweet. I’m digging this dude and can’t wait until I see him rigged and moving around in Metaversal environments, as well as on my desk.
He’s slow and tires easily, but damn!

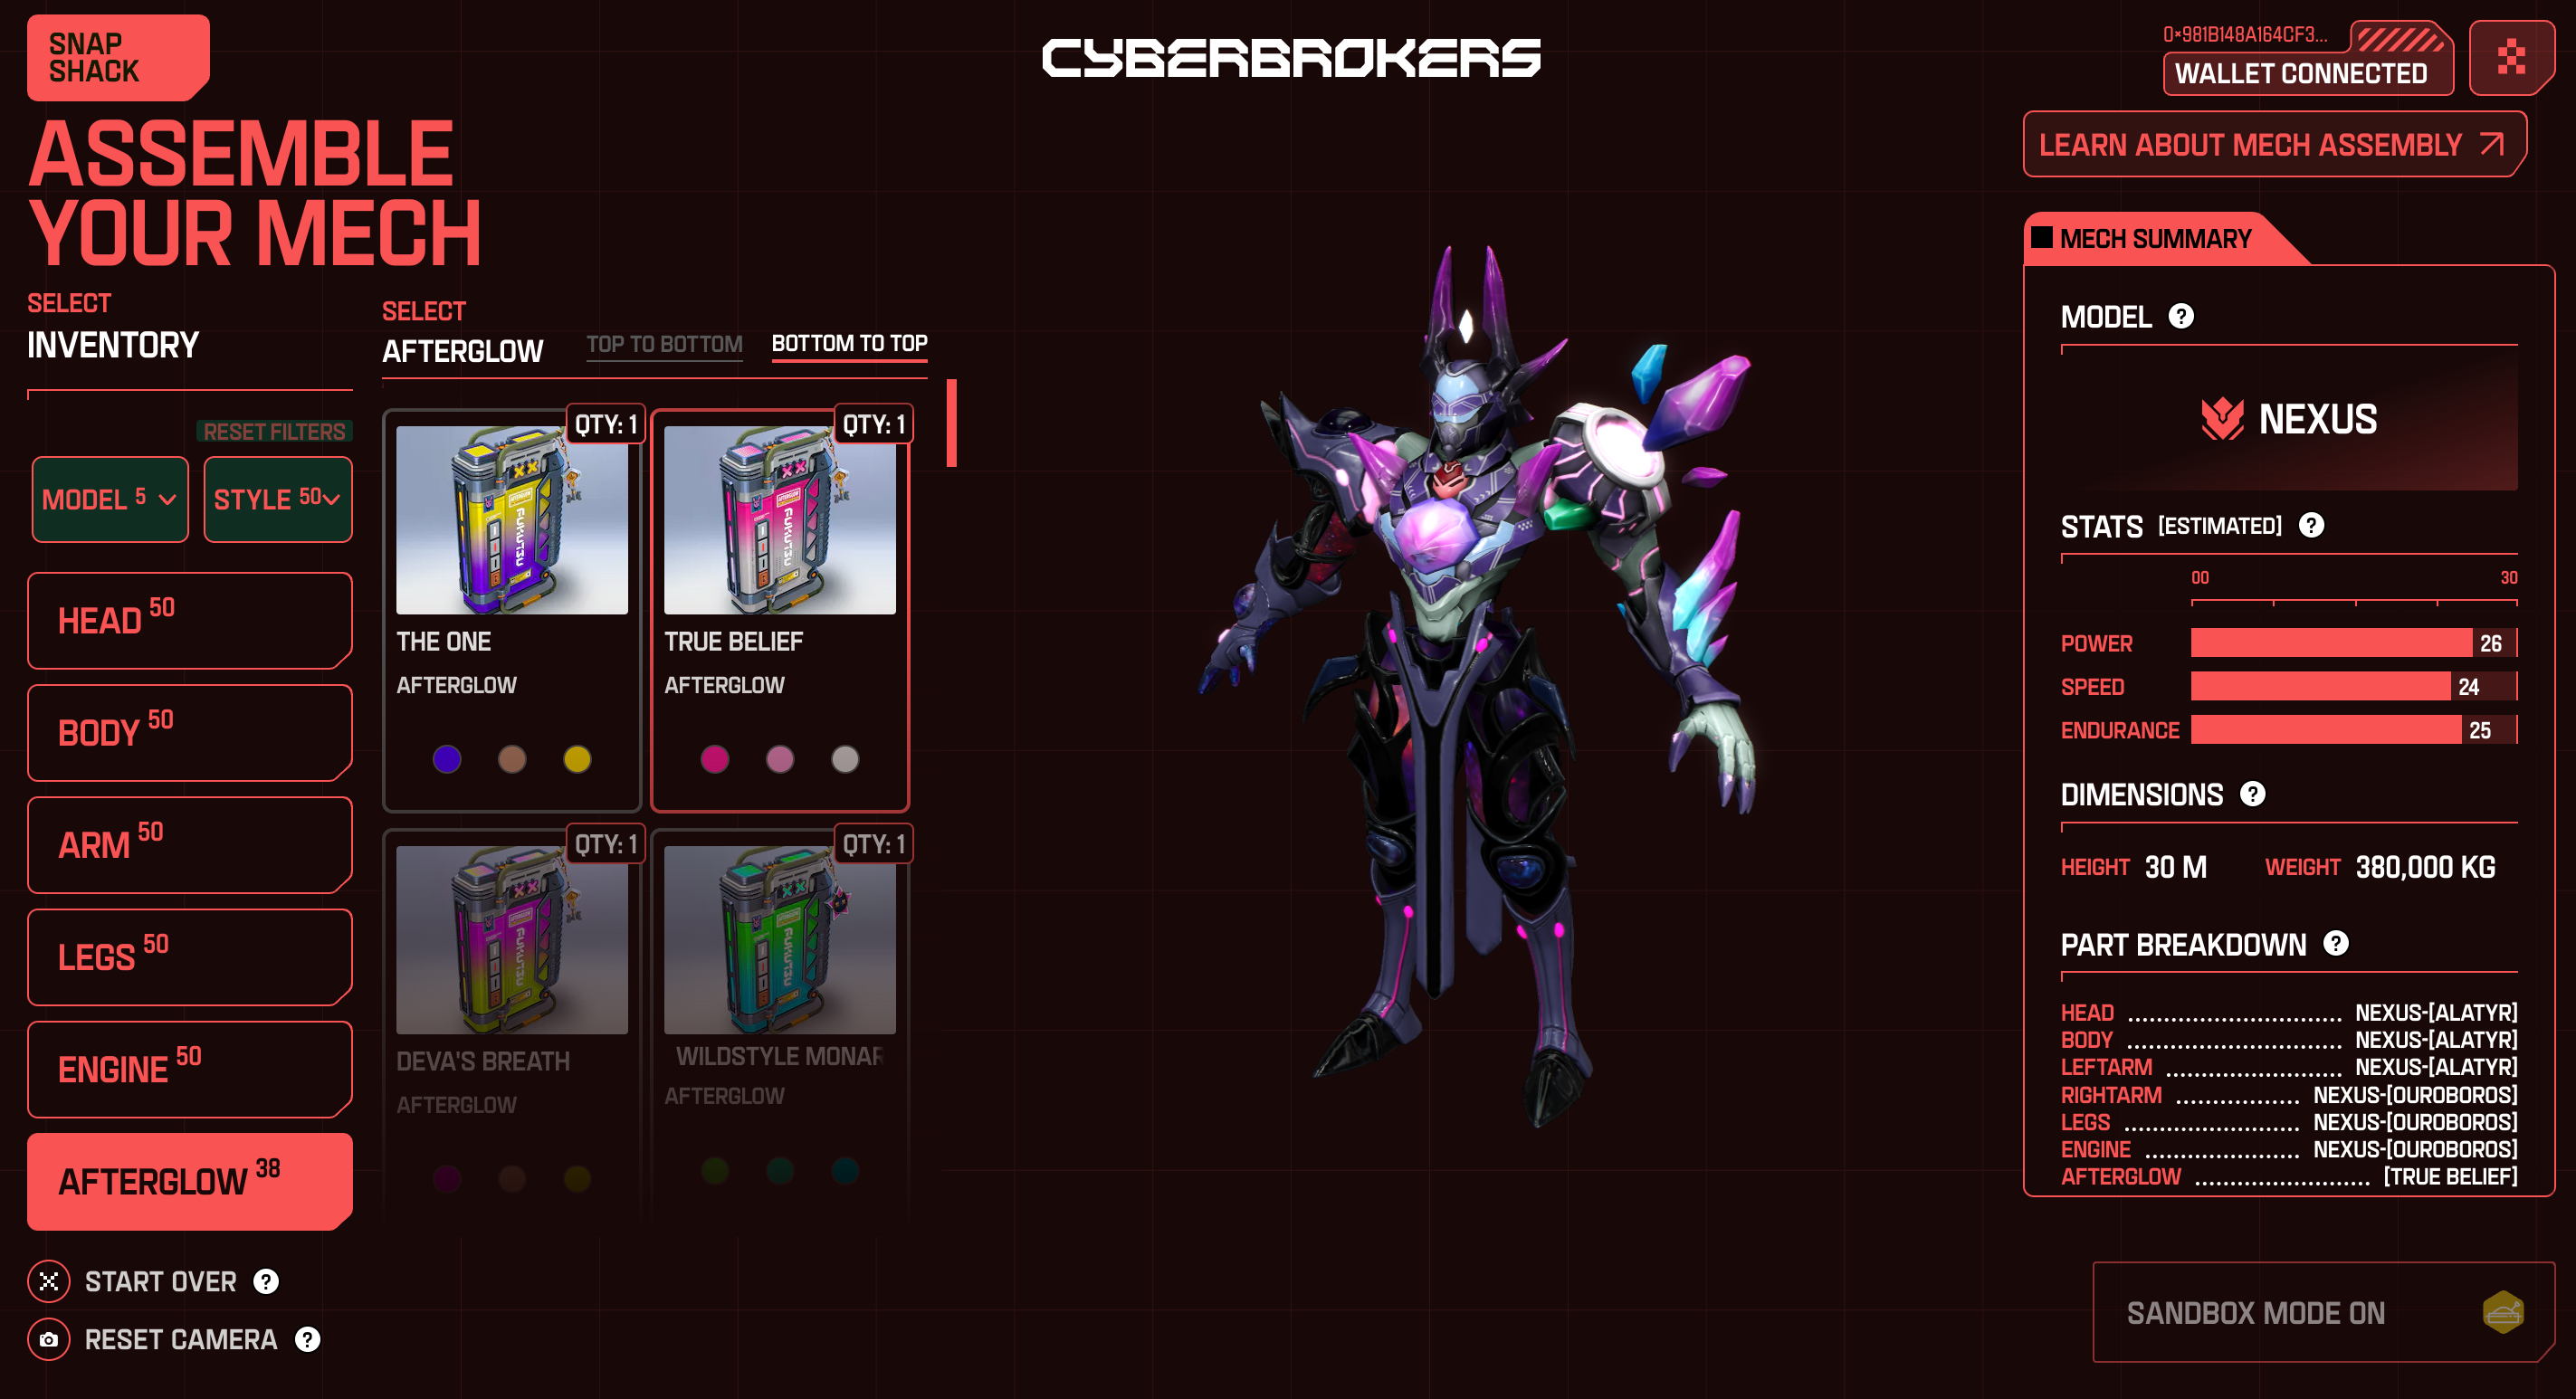
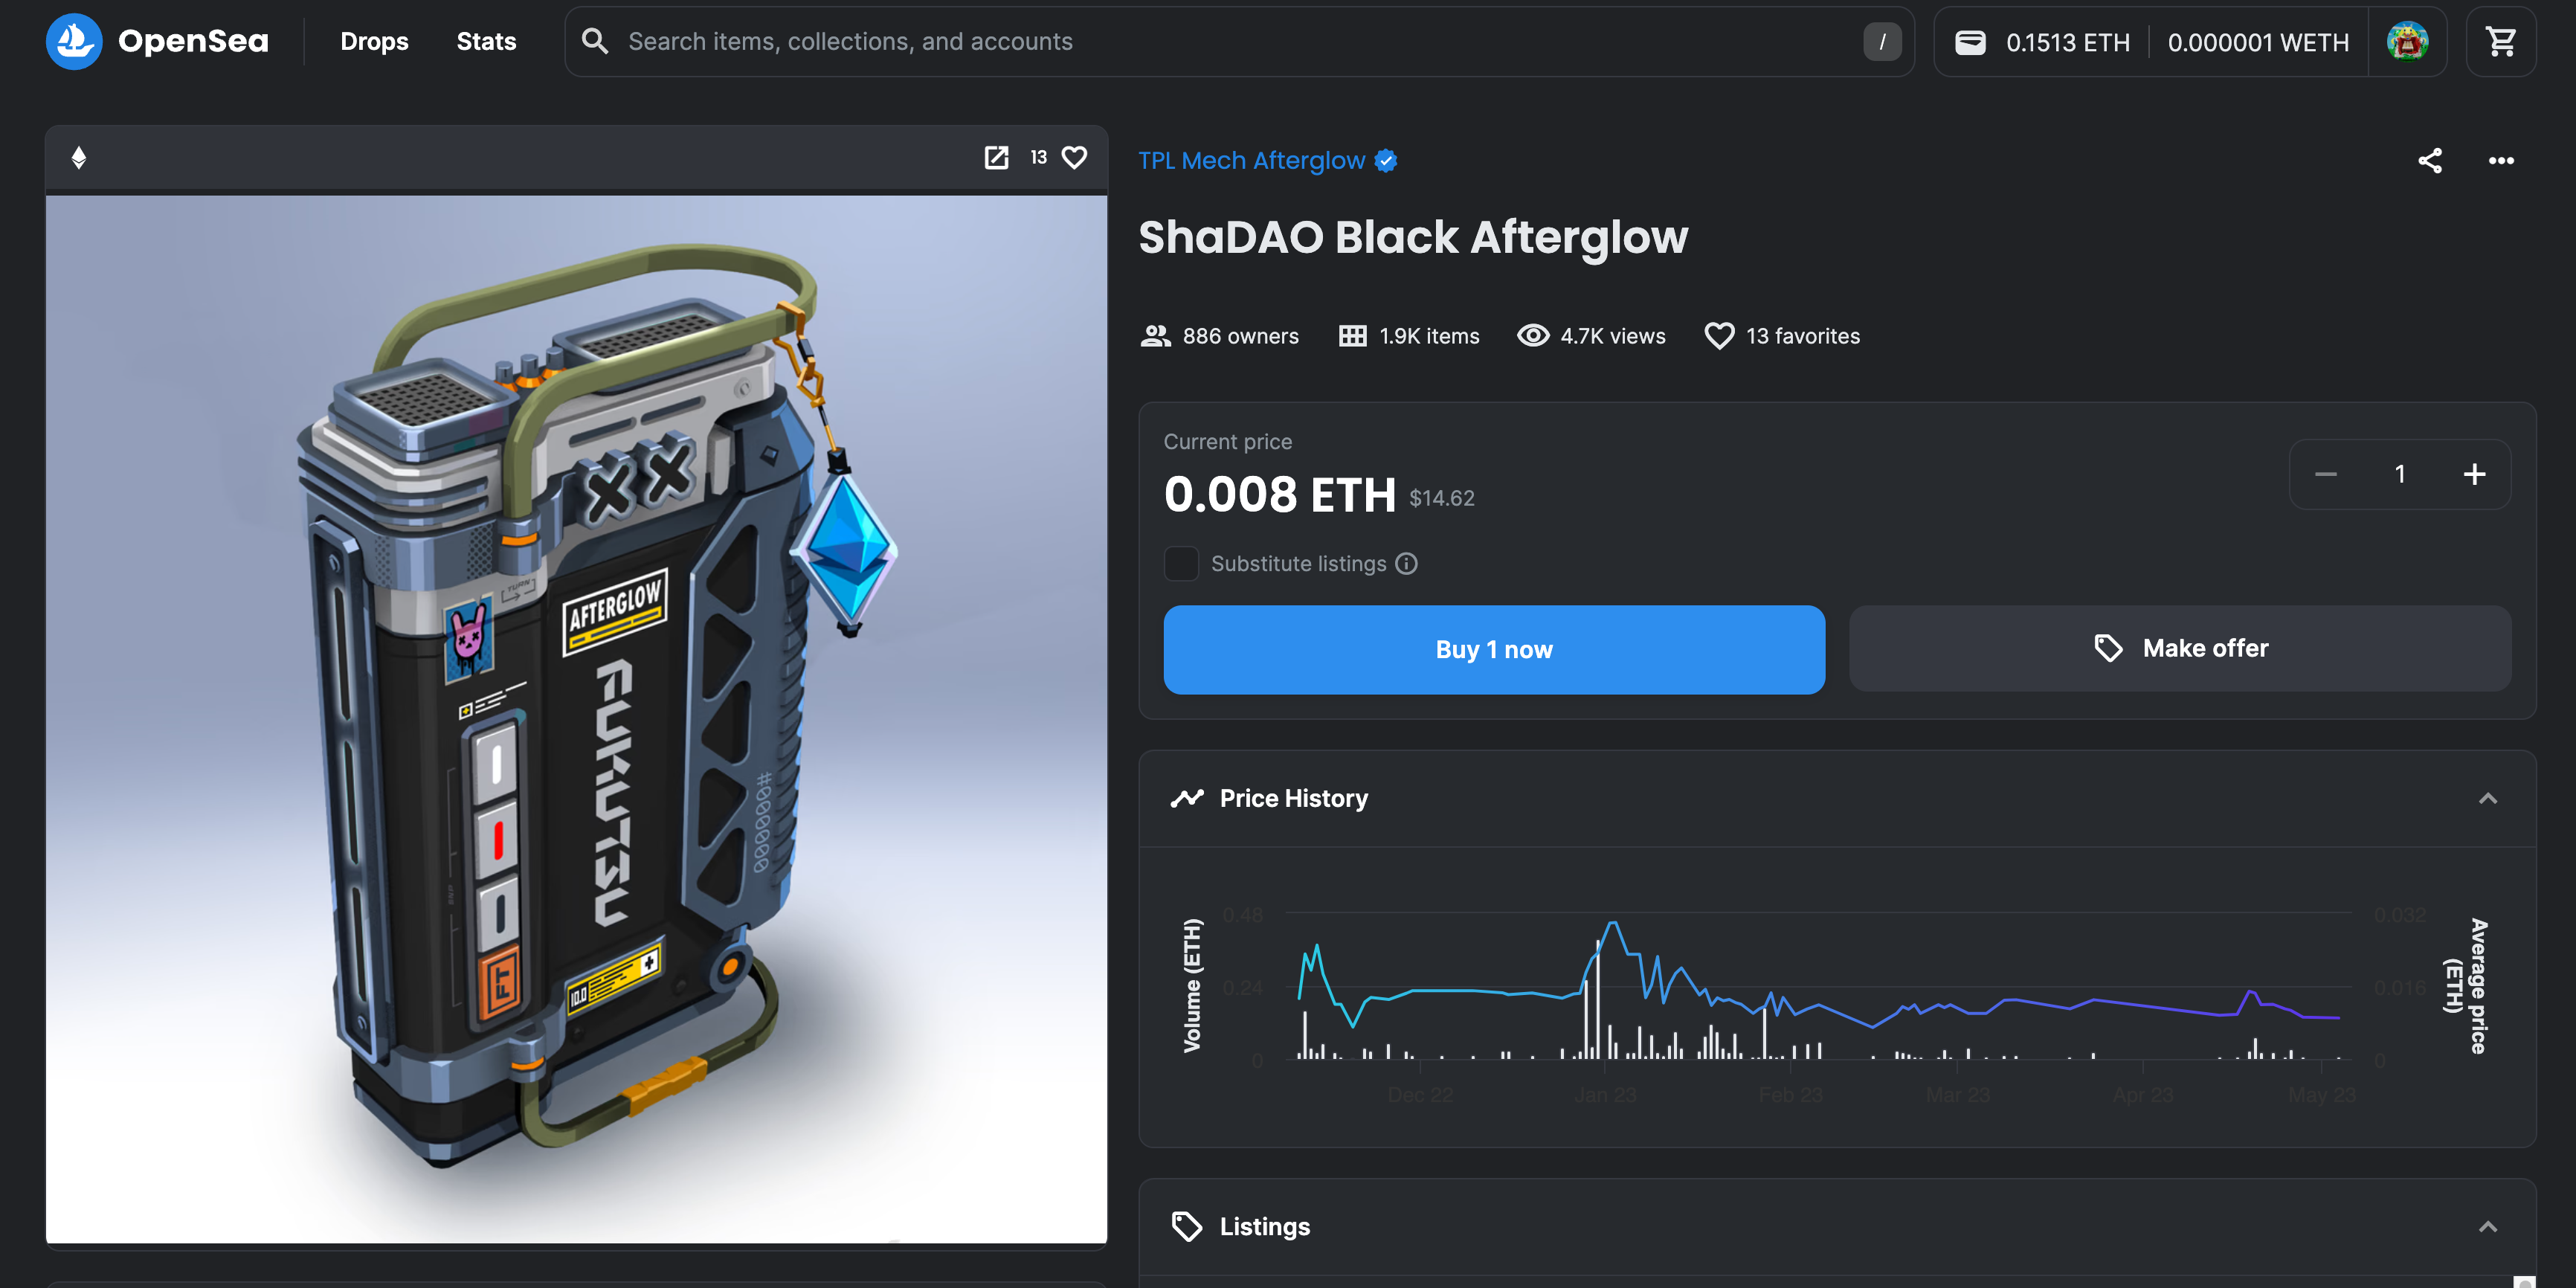
One Last Asset
After I built my mech I realized that I was short one asset. It got me a little worried at first because I thought, “Oh, shit, what if that Afterglow costs me 2 ETH?”. I jumped back over to OpenSea and couldn’t find the Afterglows. Fortunately, when I went to the CyberBroker Discord and asked about it, I got an answer within 3 minutes. Turned out that the Afterglows are a whole other collection. After getting that message from another user, I was able to wrap up my mech for just a few more fractions of an ETH. Afterglow assets are a different collection on OpenSea. Not sure how I would have figured this out if it weren’t for a rapidly responding community –Thanks @Kess.
Naming
After getting my Mech built, I clicked over to the naming page. This was an arduous adventure, mostly because I didn’t really love most of the names I was given. I spent quite a bit of time here getting combinations of compound names with recycled syllables. Finally, I got tired of clicking and settled on something reasonable. If there were to be one thing I’d like to change, it’s this. After spending hours building this thing, and over $600 USD, it would be nice if I could name it myself and not have to live with a name that’s been given to me. I’d have much preferred a review process or a profanity filter.
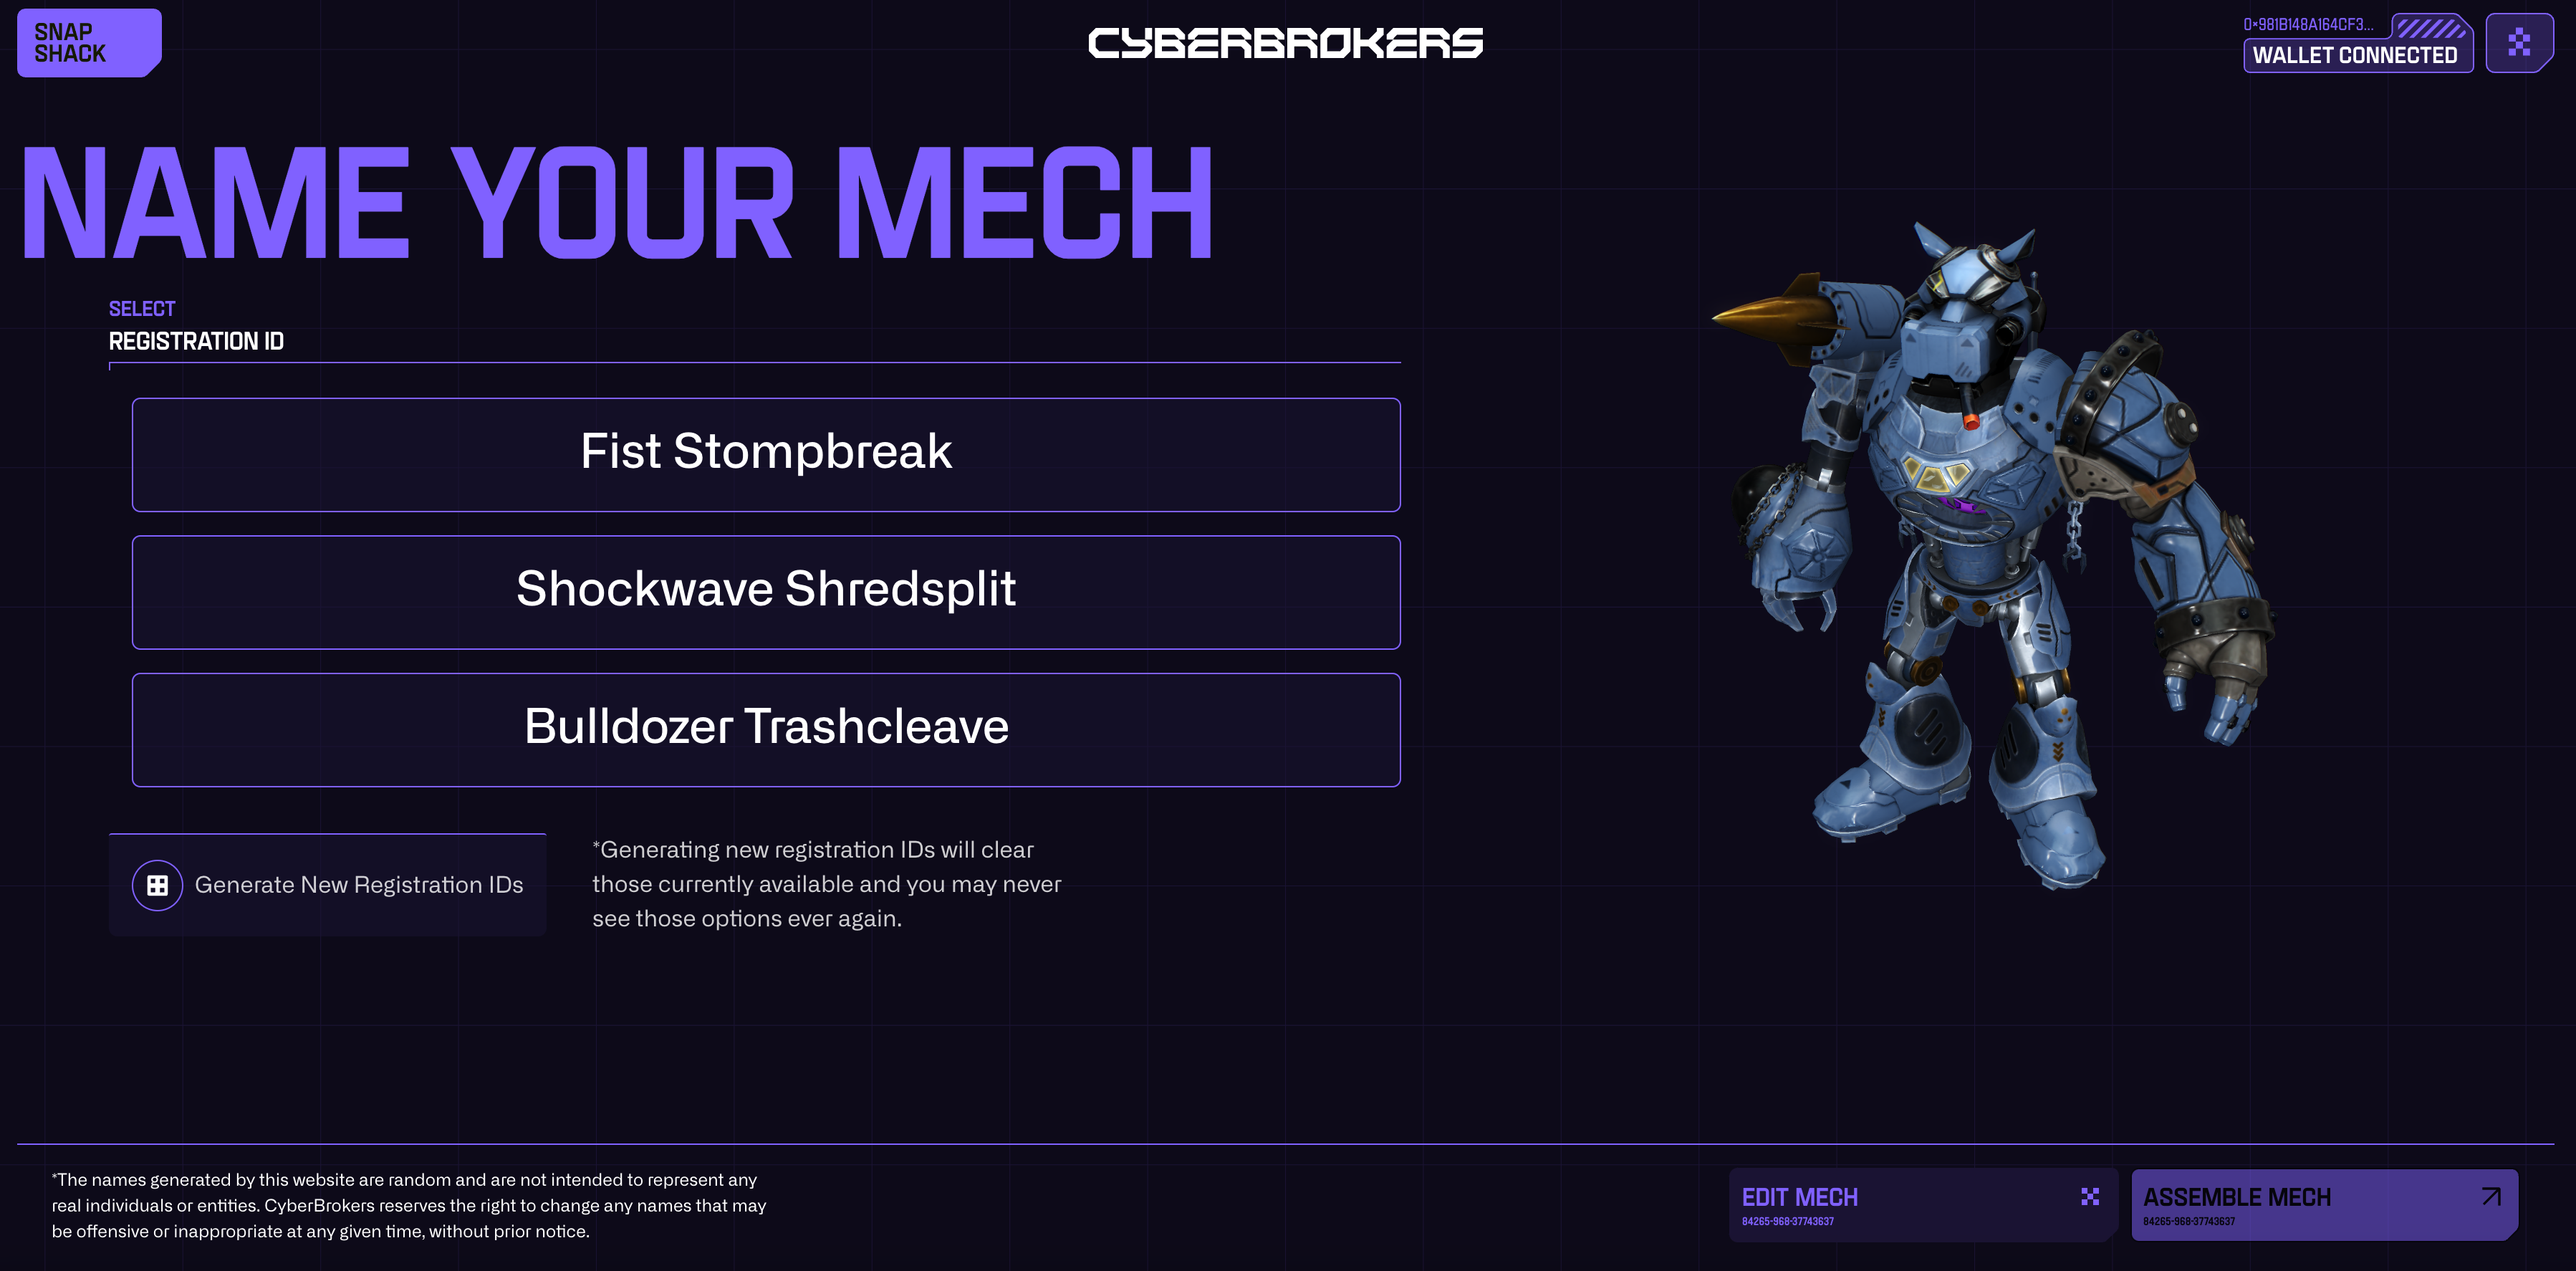
Eventually, after cycling through at least 100 screens, I landed on Fang Razeknock. Not perfect, but I like the name Fang, cuz I also like the punk band of the same name.
On to Printing
Once I finished-up here, I was itching to move onto getting this guy printed. Back at OpenSea, I had to refresh metadata and wait. In this case, I went to bed (at 3:00) AM, tired from all the name deciding, and looked again in the morning.
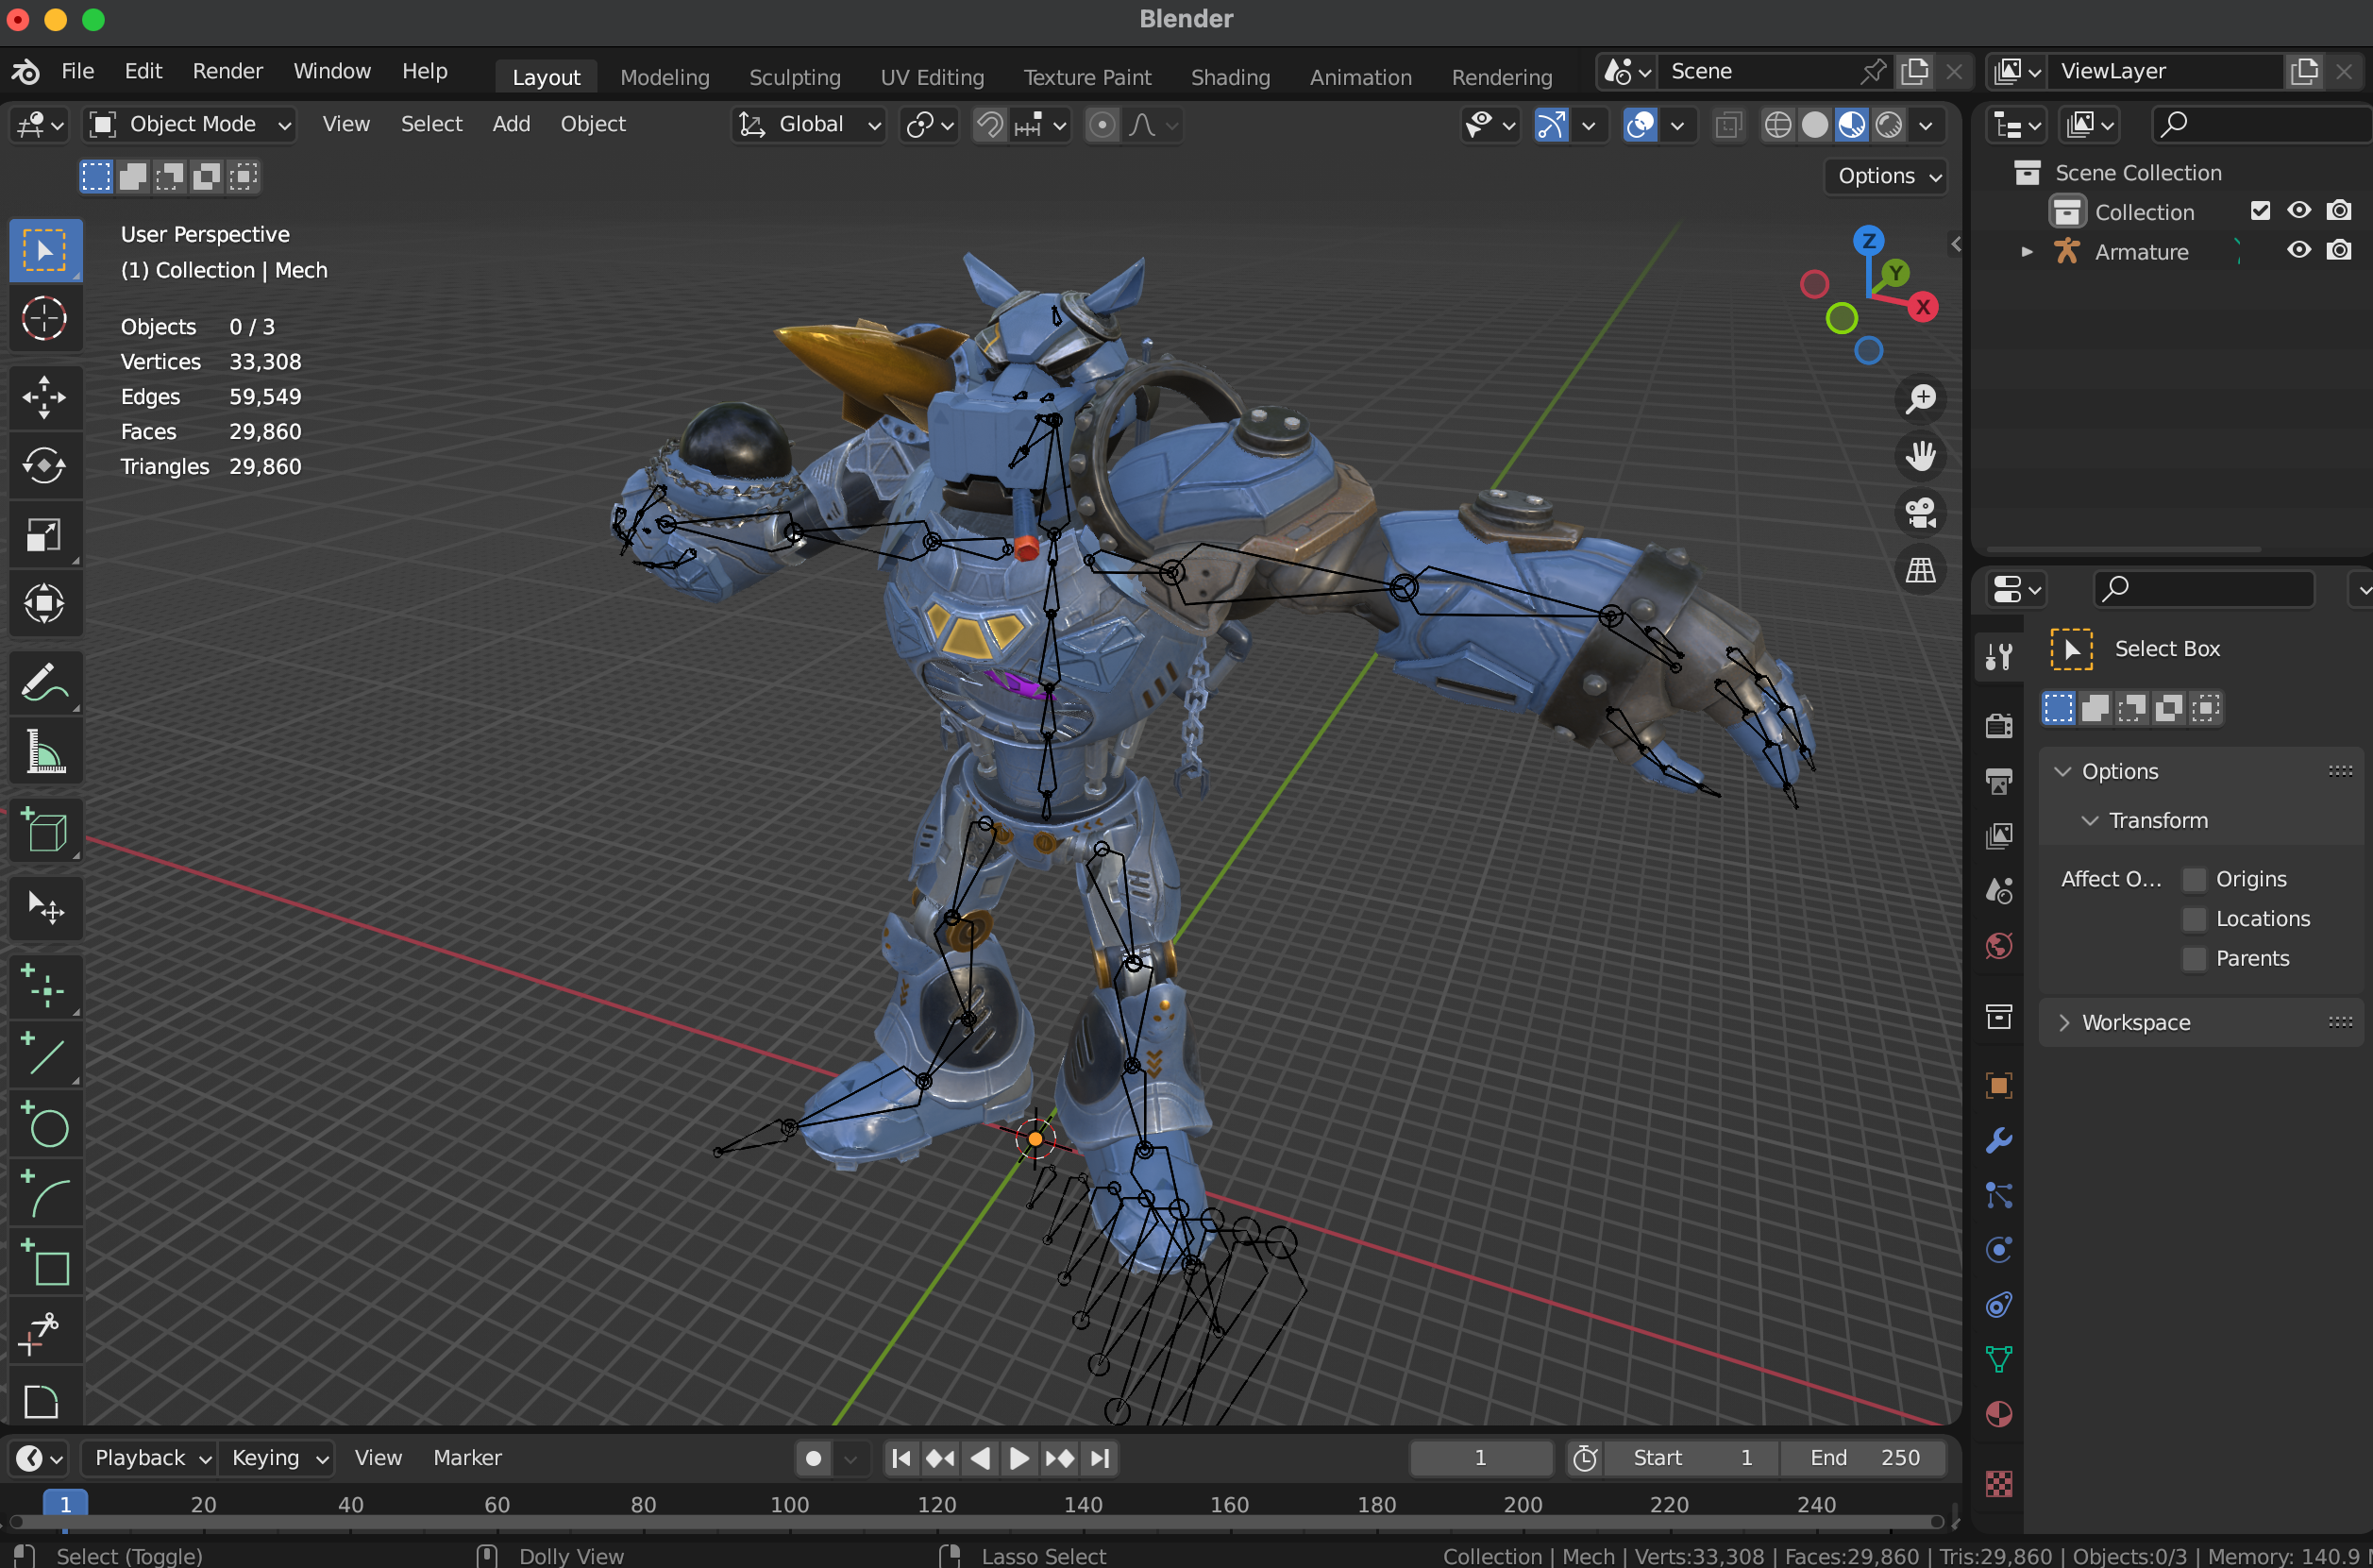
I was stoked to find 3D VRM files, but a bit surprised to not find an FBX or STL. While these are great rigged assets for gaming and Metaverse environments, they require a converter to get them to a format you can run through a slicer.
A quick trip to ChatGPT gave me the perfect instruction for doing this in Blender. I found the perfect add-on here: https://vrm-addon-for-blender.info/en/
After following the instructions above, I was greeted by my fugly friend Fang in Blender!
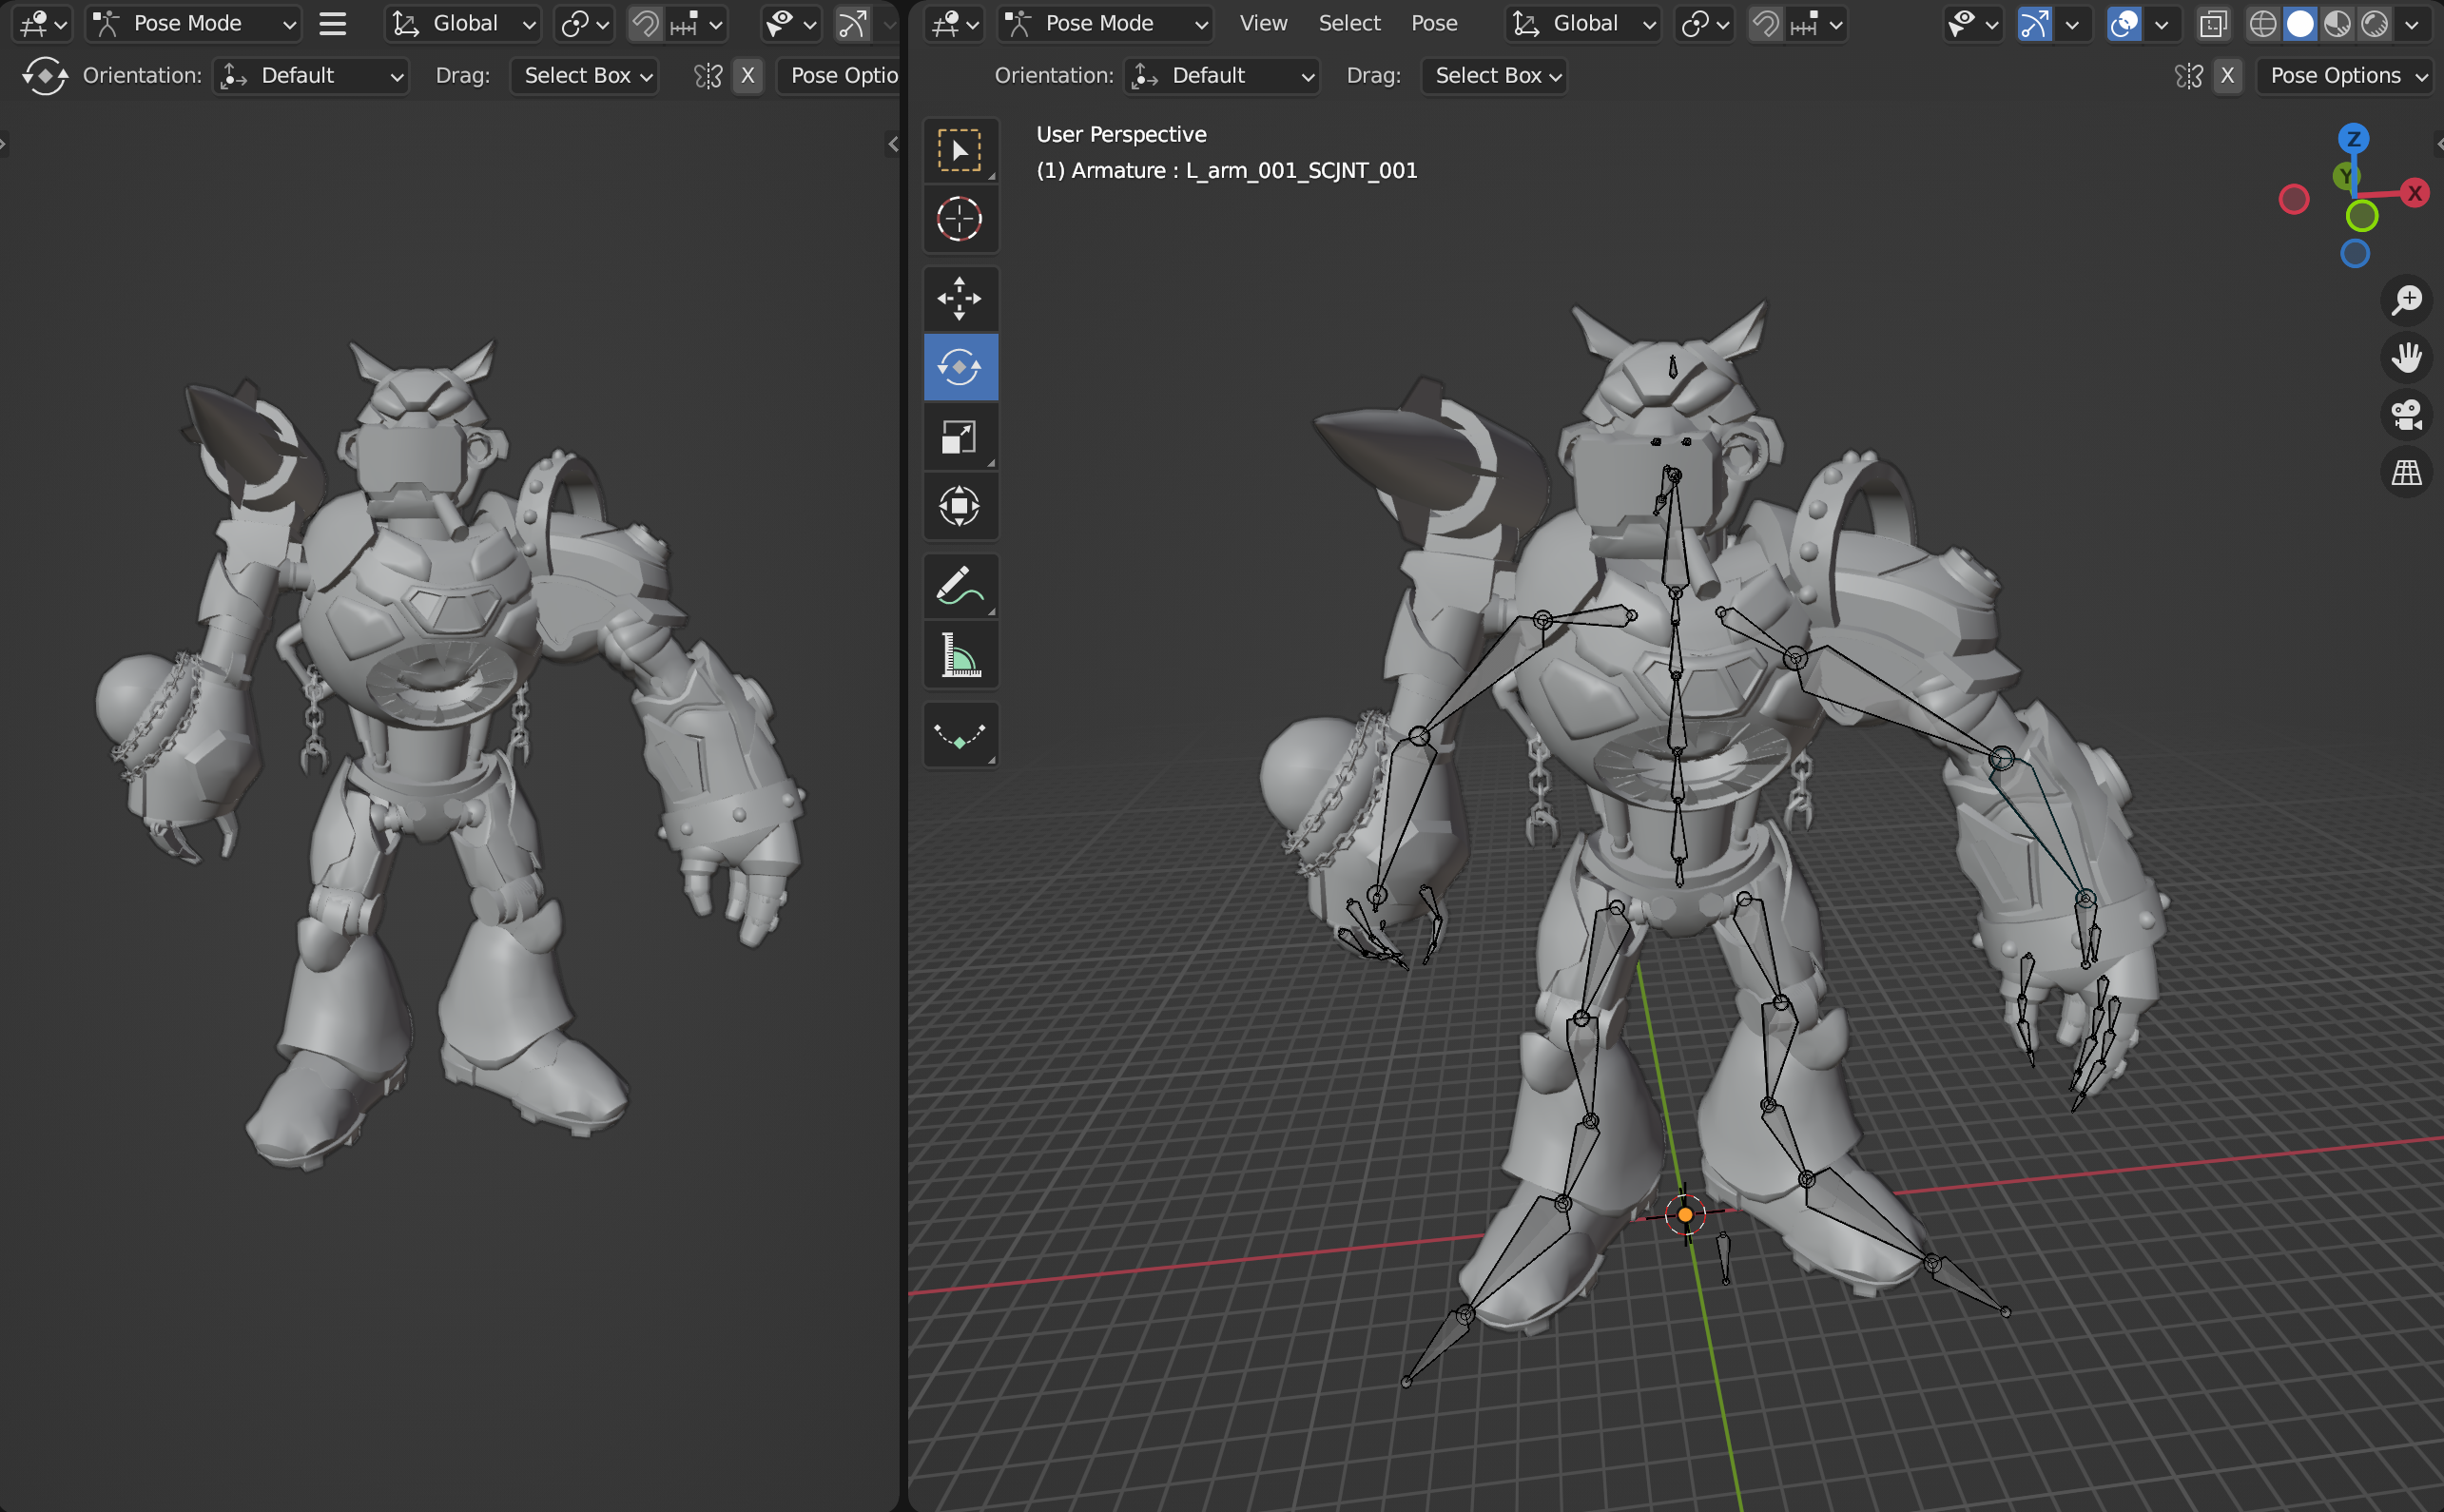
Strike a Pose
Now I’m not bad with modeling in Blender, but rigging and animation are not my strong suit, so this took a bit of skill stretching on my part. But again, thanks to AI chat sites that give you excellent instructions, I was able to get done what I needed to get done in a reasonable amount of time. This topic is a tutorial of its own, so if you want to do the same, you’ll need to figure this out for yourself.
There’s also a whole lot of scale stuff in Blender you’ll need to solve to 3D print. I recommend starting here: https://www.youtube.com/watch?v=VihRvil3138
After a bit of trial and error, I came up with this:
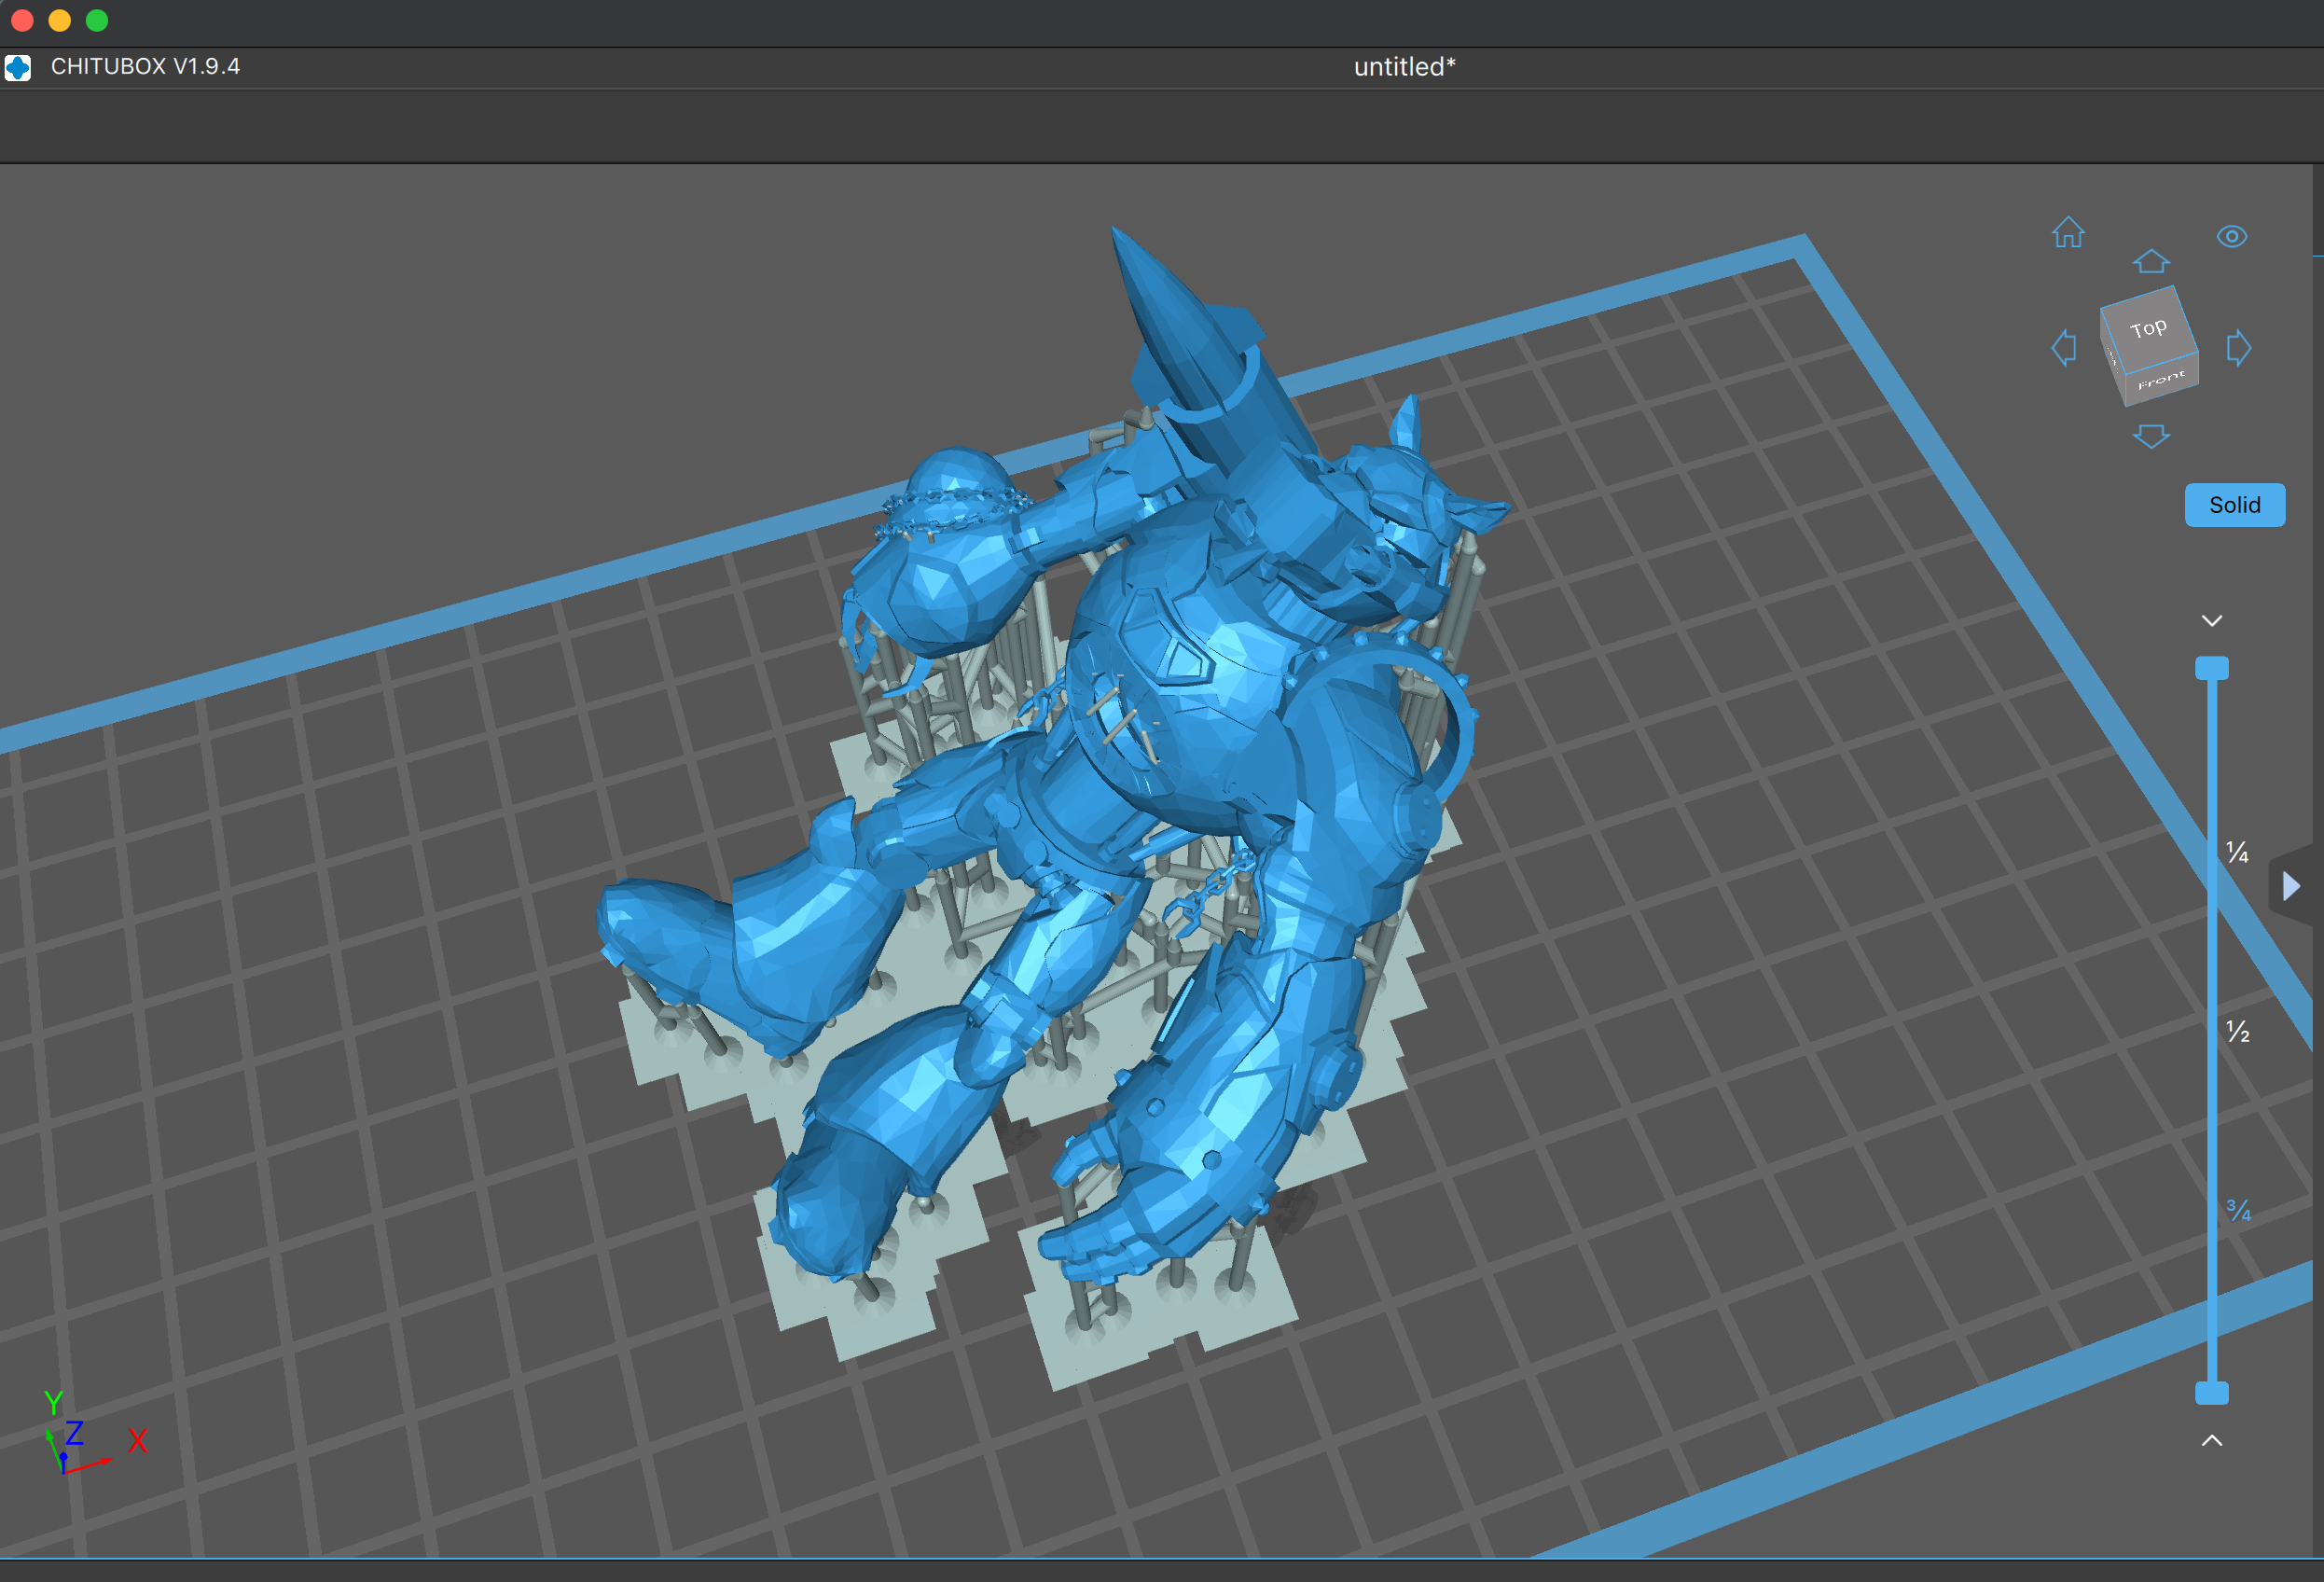
Slicing and Dicing
Chitubox to the rescue --the easiest slicer on the market. I threw some supports in and hit print! Now off to other things, while my Elegoo got to work for 3 hours.
Trouble in Printing Paradise
3D printing is never easy, and this was no exception. My first build failed. I tested variations that were a lot smaller and they fell apart, and then my third build exposed some issues with the way different parts of the model connected to other parts. Here’s what my best build up to this point looked like:
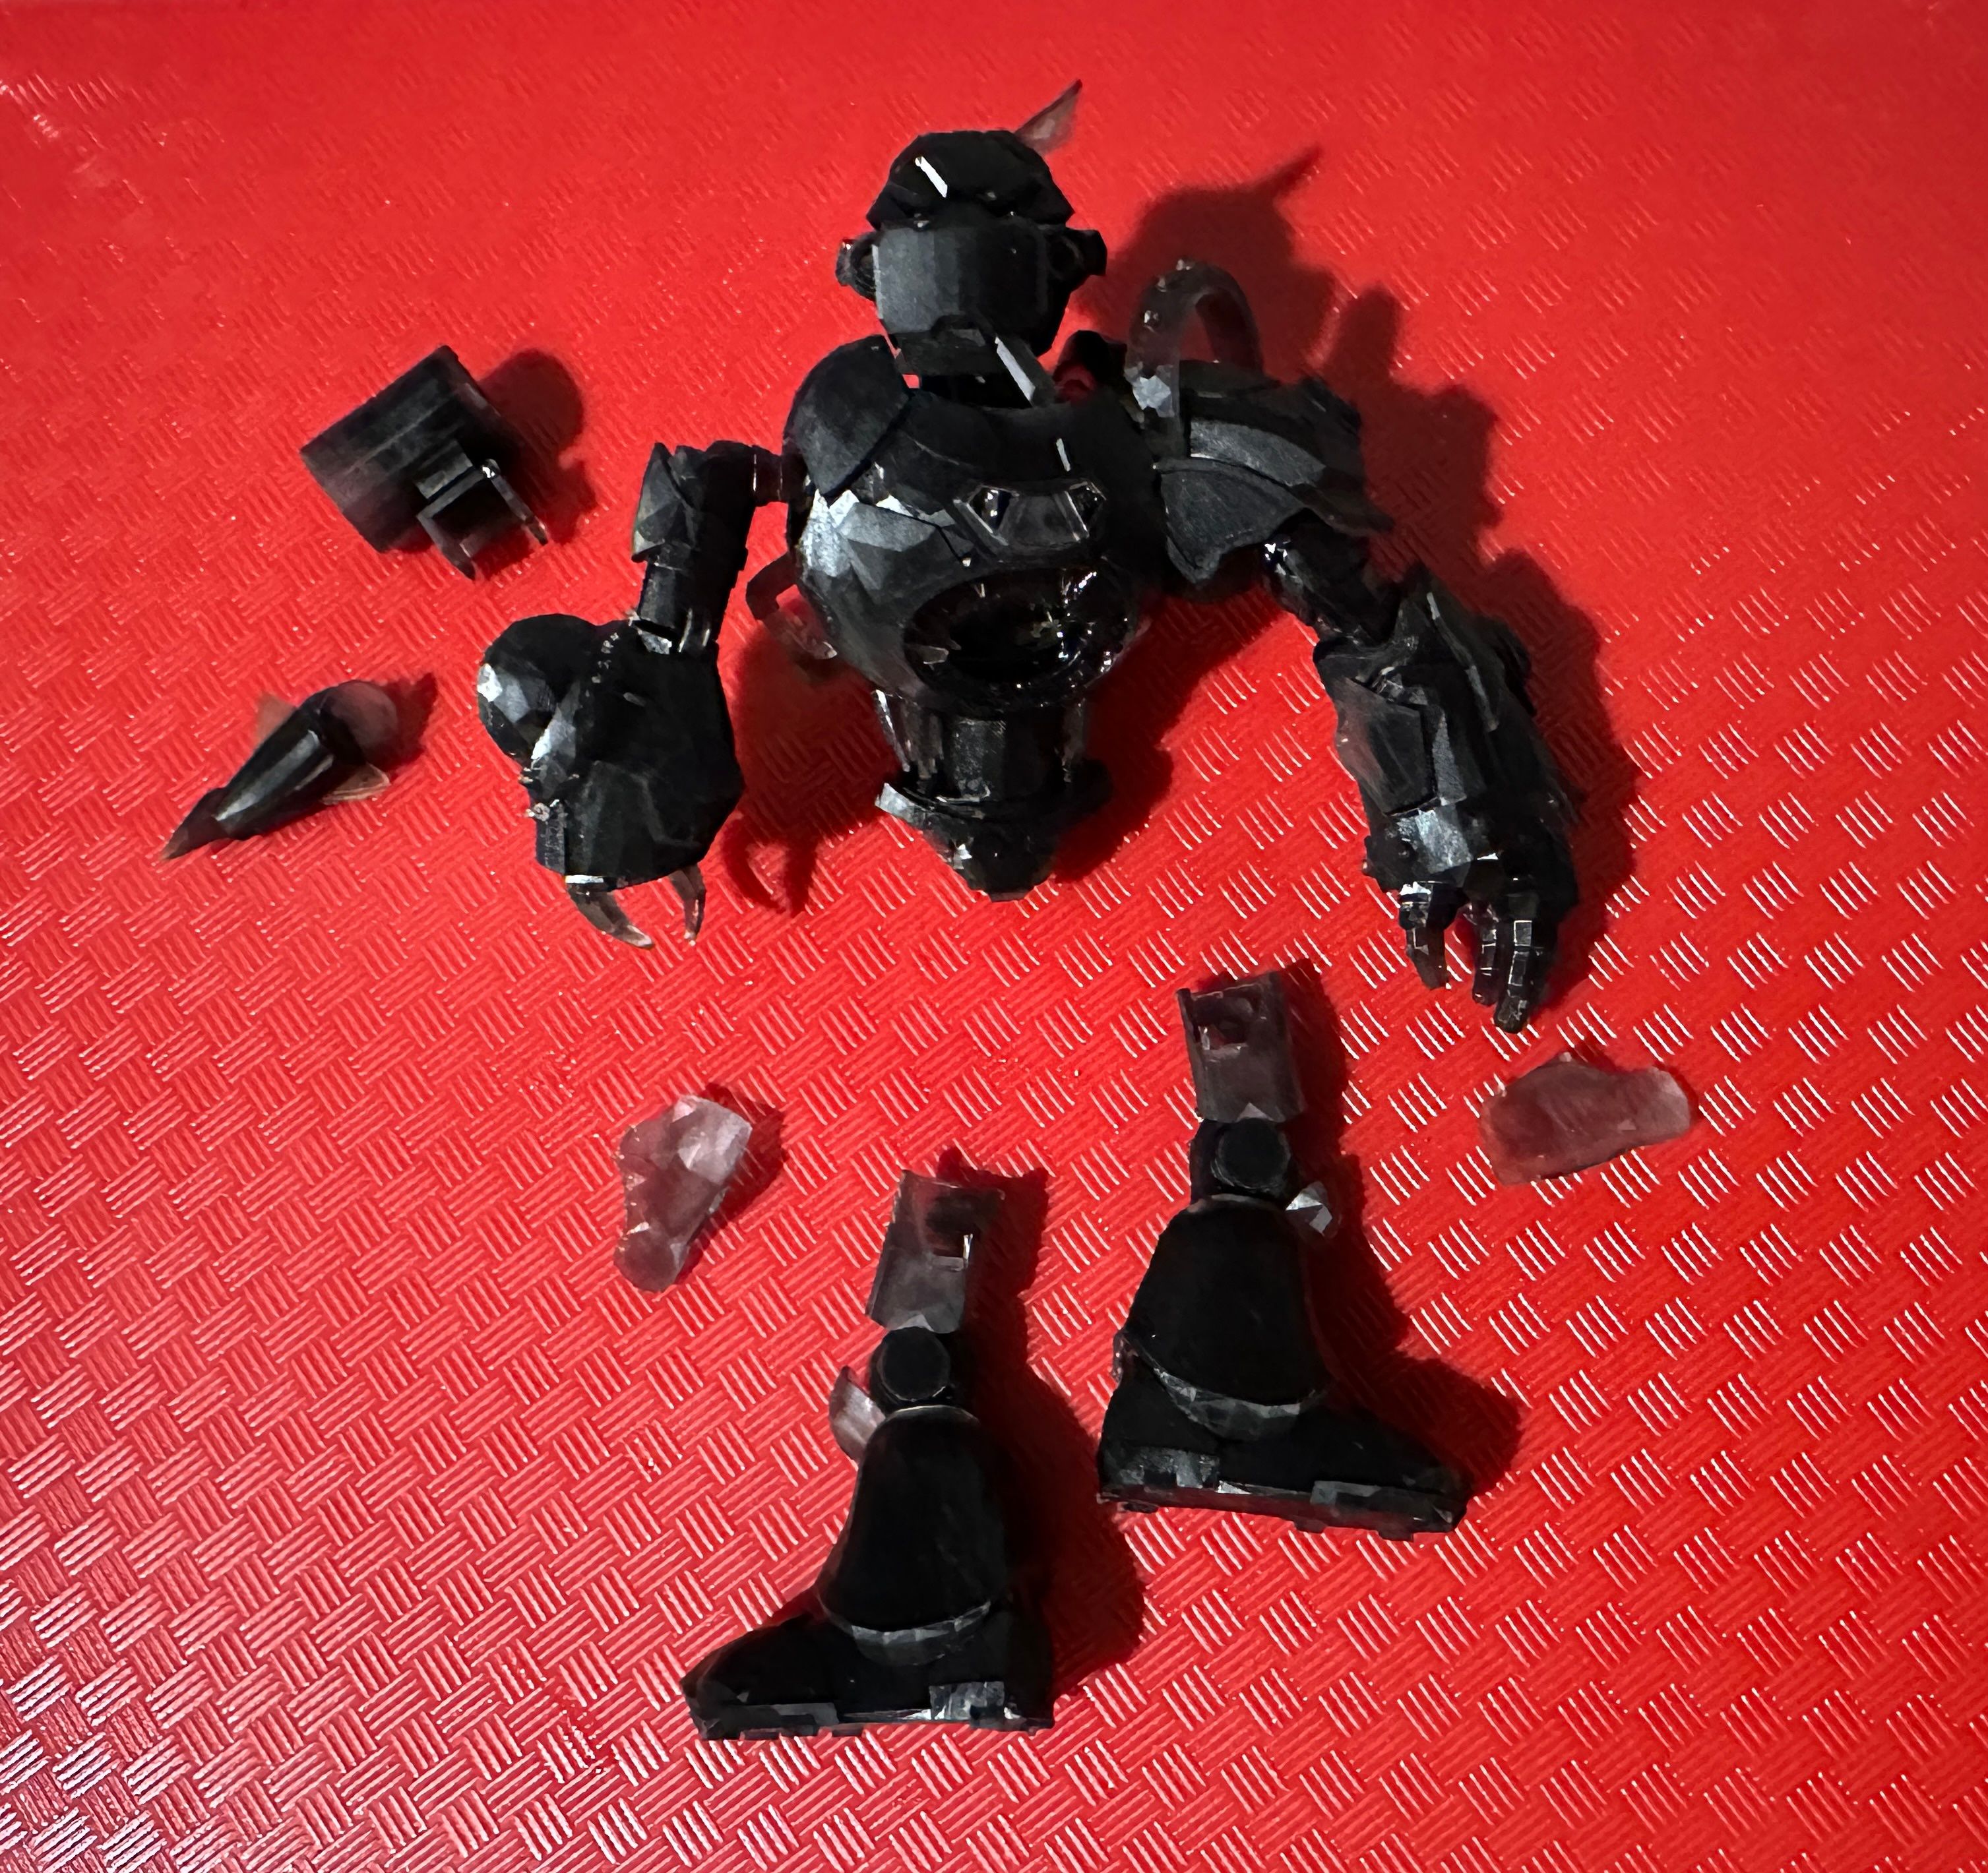
Now, some of this is my fault, like when I hastily broke an ear off, but other things were definitely caused by issues with the model's connections. For instance, the legs and the missile fell off immediately while I was washing it and removing supports. And, tiny details, such as the chains, were really hard to not damage.
Back to Blender
So, I went back into Blender and did what I could to add some support, while trying to stay true to the original artist’s intent. This included modifying the leg connections, bridging the armor onto the legs, lengthening the back of the missile in the tube so it wasn’t just supported by its fins, and securing the launcher to the shoulder. This was fairly complicated, since the model is so sophisticated, and it put my Blender skills to the test.
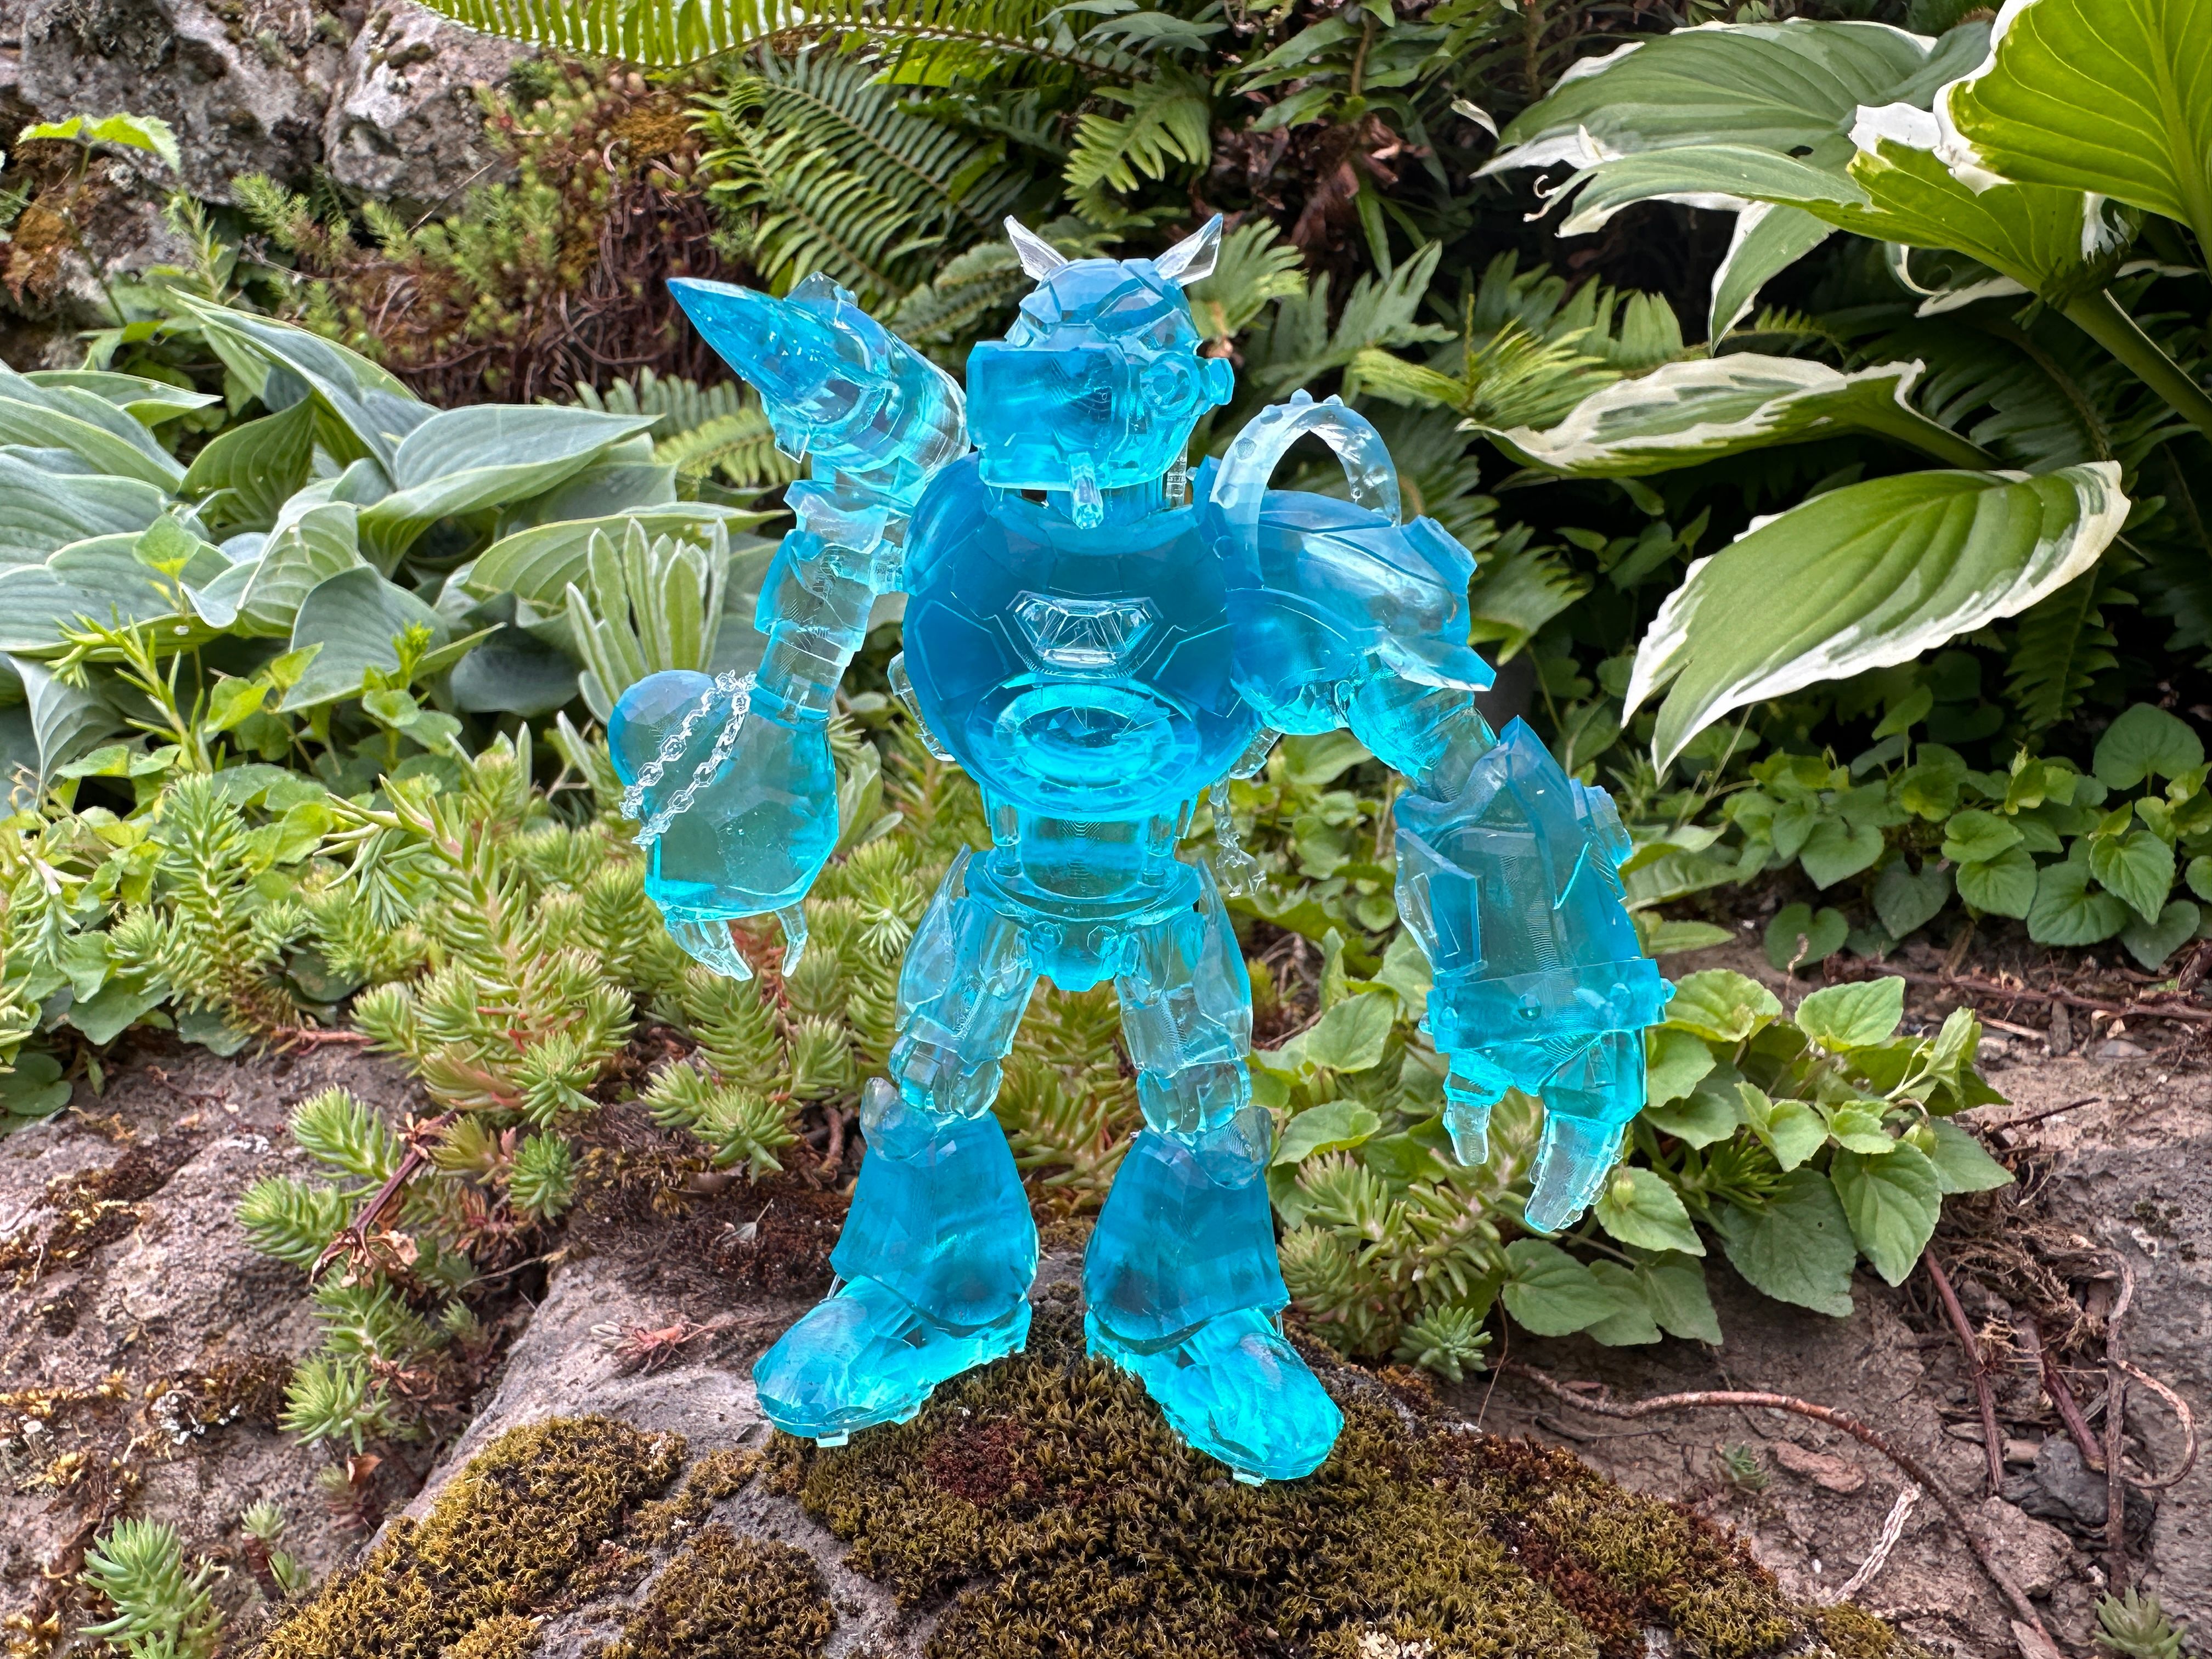
The Ender
It all worked-out. Builds took about 3.5 hours on my Saturn 2 8K printer, and the final printed model stands just over 6 inches tall. I love it! It was a really fun model to work with and I learned a few things along the way. This was not easy by any means and took me several hours and iterations to get it right. Without some solid intermediate 3D modeling skills and experience with a 3D printer, it would have been impossible to print straight from the files included with the NFT. Perhaps this is why there’s not yet an STL included.
Overall, it took a little longer than I expected, and I don't think it could have been done without at least an intermediate understanding of modeling and 3D printing, but it was super fun to do and I learned a lot in the process.
Hit me up @s_q_u_i_s_h on Twitter or on the CyberBrokers Discord if you try this yourself and get stuck. I can't promise I can help, but I'll give it a shot.
And, thank you @cyberbrokers for making it possible. Fang now stands in all his glory on my desk, reminding me that the convergence of digital and physical NFT's is already happening and "We early"!